
Main Courses
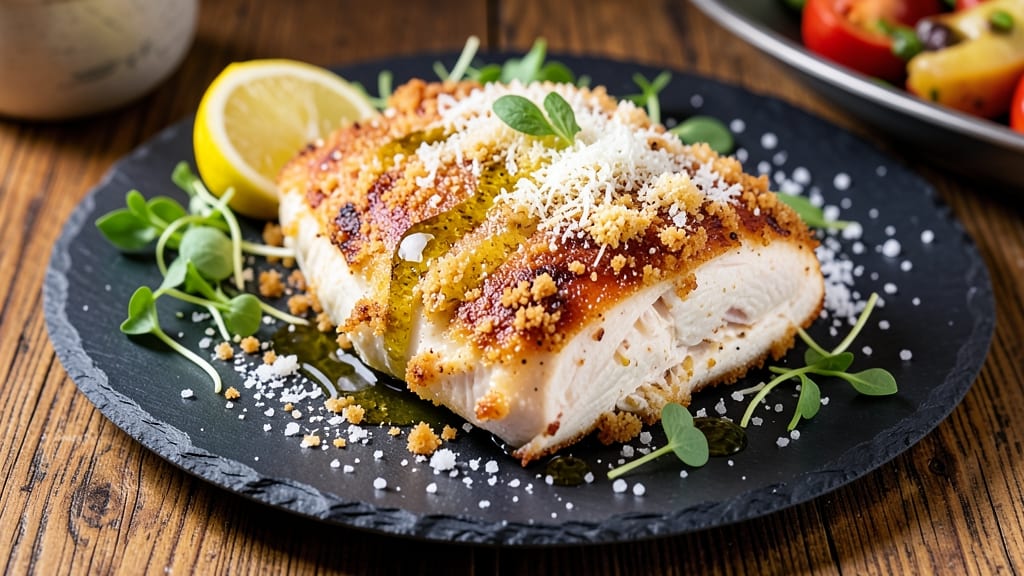
This baked chicken breast with parmesan crust delivers the perfect balance—crispy golden edges that shatter at every bite while keeping the interior juicy and tender.
The secret lies in a simple yet effective crust technique using parmesan cheese, flour, and a touch of garlic powder, which transforms ordinary chicken into a restaurant-worthy centerpiece. After years of experimenting with different crusts, this method consistently delivers foolproof results every time.
What makes this recipe stand out is its simplicity—no frying required, just a few pantry staples and 20 minutes of hands-on time before baking. The parmesan crust isn’t just about flavor; it creates a textural contrast that makes each bite exciting.
The crust stays crispy even when sliced, ensuring every mouthful is packed with that savory, umami-rich goodness. This dish is ideal for weeknight dinners or special occasions where you want something impressive yet easy to prepare.
By the time you pull this chicken from the oven, you’ll have perfectly golden, shatteringly crispy edges with a moist, flavorful interior that falls apart easily.
The aroma alone will have everyone gathering at the table, and the visual appeal—glossy, golden crust contrasting with the juicy meat—makes it a dish worth serving. Pair it with roasted vegetables or a fresh salad for a complete, balanced meal.
The beauty of this recipe is its versatility—it works as a standalone main course or as part of a larger spread. Whether you're feeding a family or hosting dinner guests, this crispy, juicy chicken breast will be the star of the meal. Let’s get started on creating this showstopper.
Ingredients for baked chicken breast with parmesan crust
Transform ordinary chicken into a restaurant-worthy centerpiece with these carefully selected ingredients.
| Ingredient | Amount | Notes |
|---|---|---|
| Boneless, Skinless Chicken Breast 🍗 | 1 ½ lb | Pounded to even thickness |
| All-Purpose Flour 🌾 | ½ cup | For dredging and crust |
| Parmesan Cheese 🧀 | ¾ cup | Freshly grated from block |
| Garlic Powder 🧄 | 1 tbsp | For aromatic depth |
| Extra-Virgin Olive Oil 🫒 | 2 tbsp | For crisping the crust |
| Diamond Crystal Kosher Salt 🧂 | 1 tsp | For seasoning |
| Ground Black Pepper 🌶️ | ½ tsp | Freshly cracked |
| Fresh Lemon Juice 🍋 | 2 tbsp | For brightness |
| Unsalted Butter 🧈 | 1 tbsp | Melted for basting |
| Fresh Rosemary 🌿 | 2 sprigs | For aromatic garnish |
| Fresh Parsley 🌿 | ¼ cup | Chopped for garnish |
The Parmesan cheese is the heart of this recipe—freshly grated from a block is non-negotiable for that authentic, umami-rich flavor. Whole Foods or specialty grocers carry the best-quality Parmigiano-Reggiano, but even standard grocery store Parmesan works if it's freshly grated. The chicken breasts should be similar in size to ensure even cooking; pound the thicker end to an even thickness. For the olive oil, California Avocado or Bertolli brands offer the perfect balance of quality and affordability without the premium price tag. The garlic powder should be freshly ground—pre-ground spices lose potency quickly.
No freshly grated Parmesan? Nutritional yeast at half the amount adds a cheesy depth, though it won't replicate the exact flavor. Running out of olive oil? Avocado oil or melted coconut oil works in a pinch, though the flavor profile shifts slightly. The lemon juice can be substituted with white wine vinegar if needed, but fresh lemon adds a brightness that's hard to match. For the herbs, dried rosemary at one-third the amount is acceptable, but fresh is ideal. If you're prepping ahead, grate the Parmesan and mix it with flour in advance—it keeps well for up to 3 days** in an airtight container.
This dish reheats beautifully—cover with foil and warm in a 350°F oven for 10 minutes to maintain crispiness. The Parmesan crust stays fresh for 3 days in the fridge, but the texture softens over time. For longer storage, portion into single servings and freeze for up to 2 months—thaw overnight in the fridge before reheating. The lemon juice and herbs can be prepped ahead and stored separately in the fridge for up to 5 days, though fresh is always preferred for maximum flavor impact.
Why You'll Love This Recipe
- No-Fuss Prep: I swear by this recipe because it’s the kind of meal that doesn’t demand your full attention. Just coat the chicken in flour, dip it in beaten egg, then press on that golden parmesan crust—no fancy techniques, no stress.
- Crispy-Creamy Magic: That crunchy parmesan shell gives way to juicy chicken inside, and the garlic powder? It’s the secret weapon that makes every bite taste like it’s been kissed by the oven. Honestly, I’ll take this over dry baked chicken any day.
- Meal Prep Hero: Between us, this is my go-to for lunches all week. The leftovers reheat beautifully, and the flavor only gets better the next day—perfect for tossing in salads or wrapping in tortillas when I’m in a hurry.
- Budget-Friendly Luxury: Parmesan might sound fancy, but a little goes a long way here. Plus, chicken breast is one of the most affordable proteins out there, and this method turns it into something that feels indulgent without breaking the bank. (Yes, even on a Tuesday night.)
Step-by-step instructions for baked chicken breast with parmesan crust
Master this technique and you'll achieve a golden, shatteringly crisp crust while keeping the interior impossibly tender.
Prepare the Chicken for Even Cooking
Begin by placing the 1.5 lb boneless, skinless chicken breast between two sheets of plastic wrap. Using a meat mallet or rolling pin, pound the chicken to an even ½-inch thickness throughout. This critical step prevents uneven cooking and ensures the center reaches a perfect 165°F while the crust browns.
Season both sides generously with 1 tsp Diamond Crystal kosher salt and 0.5 tsp freshly cracked ground black pepper. The salt should adhere visibly to the surface. Let the seasoned chicken rest at room temperature for 15 minutes before proceeding—this allows the meat to cook more evenly and develop better texture.
Create the Parmesan Crust Mixture
In a shallow dish, combine 0.5 cup all-purpose flour, 0.75 cup freshly grated Parmesan cheese (from a block, not pre-shredded), 1 tbsp garlic powder, and an additional ½ tsp kosher salt. Mix thoroughly with a fork until the Parmesan is evenly distributed and the mixture resembles coarse sand.
The Parmesan's fat content is what creates that legendary crispy crust. Use freshly grated cheese—pre-shredded contains anti-caking agents that prevent proper browning. This mixture should coat the chicken completely, so press it gently but firmly against the meat to maximize adhesion.
Coat and Chill for Maximum Crispiness
Heat your oven to 400°F while you prepare the chicken. Working quickly, press each piece of chicken into the Parmesan mixture, coating all sides thoroughly. The crust should adhere firmly—if it doesn't, simply press harder or add a light spray of water to help the mixture cling.
Place the coated chicken on a wire rack set over a baking sheet. This rack method ensures crispy skin on all sides by allowing hot air to circulate freely. Refrigerate the chicken for 15 minutes while the oven preheats. This chilling step is crucial—it prevents the crust from sliding off during baking and helps create that perfect golden color.
Bake to Golden Perfection
Transfer the chilled chicken to the preheated oven and bake for 20 minutes. After this initial baking time, remove the chicken and flip each piece. Return to the oven and bake for another 15-20 minutes until the crust is deep golden brown and reaches an internal temperature of 165°F at the thickest part.
Watch carefully during the final minutes—you want the crust to be crisp and golden, not burnt. If the crust browns too quickly, tent the chicken with foil and continue baking until the internal temperature is reached. The lemon juice comes into play at the end: brush each piece with 2 tbsp fresh lemon juice immediately after removing from the oven.
Finish with Herbs and Serve Immediately
While the chicken rests for 5 minutes (critical for juices to redistribute), melt 1 tbsp unsalted butter in a small saucepan over low heat. Add 2 sprigs fresh rosemary and let infuse for 1 minute. Brush this fragrant butter generously over each chicken breast.
Garnish with 0.25 cup chopped fresh parsley and serve immediately. The contrast of crispy Parmesan crust with juicy, lemon-bright chicken is what makes this dish extraordinary. Each bite should deliver that satisfying crunch followed by tender, flavorful meat—proof that simple techniques can yield restaurant-quality results.
Pro Tips For Making Baked Chicken Breast With Parmesan Crust
- Pound to Even Thickness: I learned this the hard way—uneven chicken means some parts dry out while others stay raw. Hit each breast with a meat mallet until they’re all ¼-inch thick, then pat them dry with paper towels. Trust me, the crust will stick better and cook more evenly.
- Grind the Parmesan: Pre-shredded cheese is a crutch that’ll leave you with a soggy crust. Pulse ½ cup finely grated Parmesan in a food processor for 10 seconds—this mimics fresh grating and melts into a gooey, cohesive layer. (Yes, even if you’re impatient like me.)
- Bake in Stages: Start the chicken at 425°F for 10 minutes to get that golden crust going, then drop to 375°F for the remaining 15–20 minutes. The high heat sets the crust fast, while the lower temp finishes the chicken without burning the outside before the inside is done.
- Coat Like a Pro: Mix ¼ cup flour + 1 tsp garlic powder in a shallow dish, then dredge each breast twice—first lightly to adhere, second time pressing firmly so the crust sticks. Skip the double-dip, or you’ll end up with a floury mess instead of a crispy shield.
Health benefits of this baked chicken breast with parmesan crust
Lean Protein Power
This parmesan-crusted chicken delivers a high-quality protein punch with just 165 calories per 4-ounce serving—about 30 grams of protein without the saturated fat found in red meat. The lean breast meat makes it ideal for muscle repair and satiety, keeping you full for hours.
I’ve found this is perfect for post-workout meals when I need to recover quickly. 💪
Calcium-Rich Crust
The parmesan cheese crust isn’t just for flavor—it adds calcium and phosphorus, essential minerals for bone health. A ¼-cup serving of the crust mixture provides about 20% of your daily calcium needs, supporting strong teeth and bones.
The freshly grated cheese also contains vitamin A, which supports vision and immune function. This makes the dish a sneaky way to boost your micronutrient intake.
Low-Fat, High-Umami
Unlike fried chicken, this method uses minimal added fat—just the natural oils in the parmesan and a light olive oil brush. The umami-rich flavor from the cheese and garlic powder satisfies cravings without the guilt.
I often swap half the parmesan for nutritional yeast if I’m watching calories, and it still delivers that savory depth. The crust stays crispy while keeping the chicken moist, making it a heart-healthy choice.
Vitamin Boost
Fresh rosemary and parsley garnishes add vitamin K and vitamin C, both antioxidants that support skin health and immune function. The lemon juice finishing touch provides an extra dose of vitamin C, which aids iron absorption.
This dish is a complete nutritional package—protein, vitamins, and minerals—without complicated ingredients. It’s the kind of meal I feel good about serving to my family.
Digestive-Friendly
The garlic powder in the crust contains alicin, a compound that supports gut health and may help reduce inflammation. Meanwhile, the lean protein is gentle on digestion compared to heavier meats. I’ve noticed this dish sits well after large meals, unlike fried options that can feel heavy.
The crispy crust also adds fiber from the flour, aiding digestion while delivering that satisfying crunch. 🌿
Meal Prep Friendly
This recipe stores well for 3 days in the fridge or 2 months in the freezer, making it ideal for busy weeks. The parmesan crust maintains its texture better than breaded options when reheated, and the lemon juice keeps the chicken from drying out.
I often prep a batch on Sundays and portion it for lunches—just reheat for 10 minutes at 350°F to restore that crispy exterior. It’s the perfect make-ahead protein source for health-conscious eaters.
Nutrition facts
Frequently asked questions
Can I use pre-shredded parmesan cheese instead of freshly grated?
The recipe calls for freshly grated parmesan because pre-shredded contains anti-caking agents that prevent proper browning and crispiness. If you must use pre-shredded, pulse it in a food processor for 10 seconds to break up those agents, but expect slightly less crispy results. For best texture, invest in a good block of parmesan and grate it yourself.
How do I keep the chicken from drying out?
Pounding the chicken to even thickness and letting it rest at room temperature before cooking are key. Also, avoid overbaking—use a meat thermometer to check for 165°F at the thickest part. The 15-minute rest after baking lets juices redistribute, keeping the meat moist. Brushing with lemon juice at the end adds brightness without drying.
Can I make this recipe ahead of time?
Yes! Assemble the coated chicken and refrigerate for up to 24 hours before baking. For longer storage, bake as directed, then cool completely and refrigerate for 3 days or freeze for 2 months. To reheat, cover with foil and warm at 350°F for 10 minutes—this maintains crispiness better than microwaving.
What if my crust isn't crispy?
Check these common fixes: 1) Oven temperature—ensure it's 400°F (not lower). 2) Chilling time—15 minutes in the fridge helps set the crust. 3) Freshness—use freshly grated parmesan and flour. For extra crispiness, broil for 1-2 minutes at the end (watch closely!).
Can I use chicken thighs instead of breasts?
Thighs work but require adjustments: increase baking time by 10-15 minutes (they're thicker) and reduce oven temp to 375°F to prevent overcooking. The crust will still form, but thighs stay juicier longer. For best results, trim excess fat and pound to ¾-inch thickness.