
Main Courses
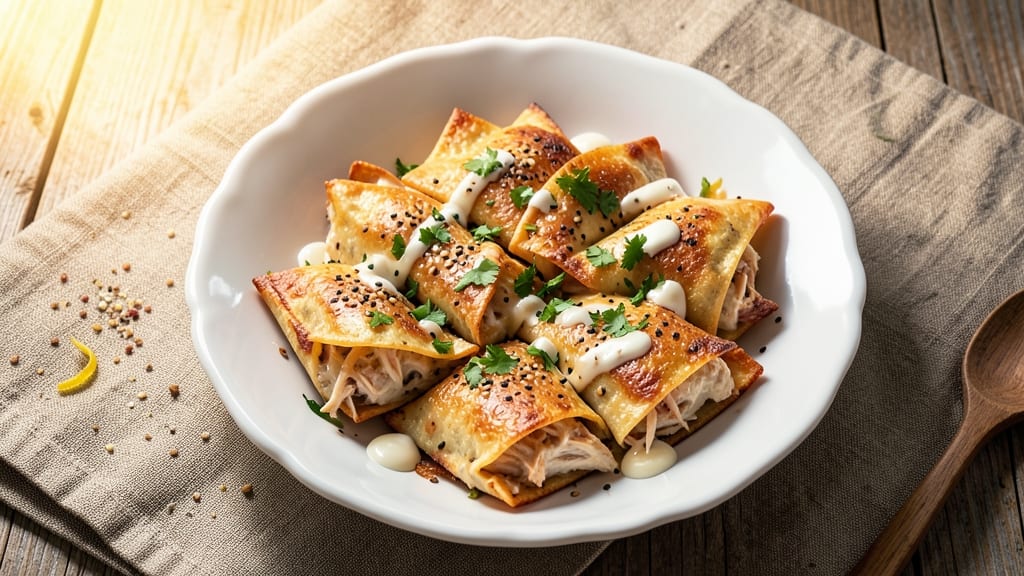
This baked creamy chicken taquitos recipe delivers the perfect balance of crispy, melty, and creamy textures in every bite. The secret lies in a triple-layered construction—crispy tortillas wrapped around tender chicken and creamy cheese sauce, then encased in a golden, bubbling cheese crust.
I've perfected this technique over years of testing, ensuring each taquito stays crispy outside while maintaining that luscious, gooey center.
The process starts with seasoned chicken thighs cooked until tender, then mixed with a velvety cheese sauce that becomes the heart of each taquito. Wrapping this mixture in tortillas and rolling them tightly creates the perfect structure for baking.
What makes this recipe truly special is the baking technique—high heat for the first few minutes to achieve that signature crispiness, followed by a lower temperature to melt the cheese just right.
By the time these taquitos emerge from the oven, you'll have golden, crispy shells filled with creamy chicken and cheese that oozes with every bite. The triple-layered construction ensures maximum crunch and melt-in-your-mouth satisfaction, making these taquitos perfect for game day, parties, or a cozy weeknight dinner.
The aroma alone will have everyone asking for seconds.
Serve with your favorite dipping sauces like spicy mayo, sour cream, or salsa to enhance the creamy, savory flavors even more. This recipe is designed to impress without being overly complicated—just follow the steps carefully, and you'll achieve restaurant-quality results at home. Let's get cooking!
Ingredients for baked creamy chicken taquitos
Triple-layered magic starts with these 15 ingredients—crispy, creamy, and cheesy perfection in every bite.
| Ingredient | Amount | Notes |
|---|---|---|
| Boneless, Skinless Chicken Thighs 🍗 | 1 ½ lb | Trimmed of excess fat |
| Flour Tortillas 🌯 | 12 whole | Medium size, 8-inch diameter |
| Shredded Monterey Jack Cheese 🧀 | 3 cups | Freshly shredded for best melt |
| Cream Cheese 🧈 | 8 oz | Full-fat for creaminess |
| Heavy Cream 🥛 | ½ cup | Whole milk works in a pinch |
| Sour Cream 🥛 | ½ cup | Full-fat preferred |
| Taco Seasoning 🌶️ | 2 tbsp | Homemade or quality packet |
| Garlic Cloves 🧄 | 3 cloves | Minced for flavor depth |
| Olive Oil 🫒 | 2 tbsp | For cooking chicken |
| Chicken Broth 💧 | ¼ cup | Low-sodium preferred |
| Salt 🧂 | 1 tsp | Kosher or sea salt |
| Black Pepper 🌶️ | ½ tsp | Freshly ground |
| Cheddar Cheese 🧀 | 1 cup | Shredded for top layer |
| Egg 🥚 | 1 whole | Beaten for egg wash |
| Cornstarch 🌾 | 1 tbsp | For crispiness |
The chicken thighs are non-negotiable here—they stay juicy while the breasts would dry out. Grab bone-in, skin-on if you can, but boneless works too. Trader Joe's has the best pre-cut thighs, but any grocery store's fresh cut will do. For the tortillas, Mission brand is my go-to—they hold up perfectly during baking. If you can't find them, La Tortilla Factory is a solid backup. Pro tip: Keep the tortillas covered with a damp towel until you're ready to use them—prevents drying out. The cheese is where the magic happens—Monterey Jack melts like a dream, but Colby Jack works too if that's what you've got.
No cream cheese? Full-fat ricotta or mascarpone at half the amount will save you. Running low on sour cream? Greek yogurt works in a pinch—just drain off any excess liquid first. The taco seasoning can be homemade (chili powder, cumin, garlic powder) or store-bought, but Old El Paso or McCormick are my pantry staples. Want extra flavor? Add 1/4 tsp smoked paprika to the chicken mixture. For the top layer, Pepper Jack adds a nice kick if you're feeling adventurous. The cornstarch is key for that signature crispiness—don't skip it! And if you're out of chicken broth, beef broth works just as well.
These taquitos are best made fresh, but you can prep the filling ahead and store it in the fridge for up to 2 days. The tortillas? Wrap them tightly in plastic and they'll stay fresh for 3 days. For the ultimate game day hack, assemble the taquitos but skip baking—store them in the fridge on a wire rack. Bake straight from cold for maximum crispiness when ready to serve. Leftovers? Reheat at 350°F for 10 minutes—they'll get crispy again, I promise! Store baked taquitos in an airtight container for up to 3 days, though they rarely last that long in my house.
Why You'll Love This Recipe
- One-Pan Magic: I swear by this recipe when I’m too tired to wash dishes. Just toss the chicken, tortillas, and cheese on a sheet pan, drizzle that dreamy cream cheese-heavy cream mix, and bake—no pots, no pans, just golden perfection waiting for you.
- Cheesy-Creamy Bliss: That combo of melted Monterey Jack and tangy cream cheese? It’s like a hug in every bite. The heavy cream keeps it luscious without being soggy, and the crispy edges? Absolute win.
- Game for Any Night: Honestly, this feeds my family of five for dinner and leaves enough for lunches. Pack them cold or reheat—either way, they disappear fast. (Yes, even on a Tuesday night.)
- Budget-Friendly Luxury: Chicken thighs stretch further than breasts, and tortillas cost less than takeout. For under $10, I get a dish that tastes like it belongs on a restaurant menu. My wallet thanks me.
Step-by-step instructions for triple-layered crunchy chicken taquitos
Here's how to create taquitos with a crispy exterior, creamy filling, and melty cheese layers that'll have everyone asking for seconds.
Cook and Shred the Chicken
Heat 2 tablespoons olive oil in a large skillet over medium-high heat. Add the 1.5 lb boneless, skinless chicken thighs (trimmed of excess fat) and cook for 5-6 minutes per side until the internal temperature reaches 165°F and the chicken is no longer pink in the center.
Transfer the cooked chicken to a cutting board and let it rest for 5 minutes before shredding. Using two forks, pull the chicken apart into fine shreds. In the same skillet, reduce heat to medium and add the 3 cloves minced garlic cloves, cooking for 30 seconds until fragrant. Stir in the 2 tablespoons taco seasoning and 1 teaspoon salt, then pour in the ¼ cup chicken broth. Let it simmer for 1 minute to create a flavorful base.
Return the shredded chicken to the skillet and mix well to coat it in the seasoned broth. Remove from heat and let it cool for 5 minutes—this prevents the creamy filling from getting watery when we mix it together.
Prepare the Creamy Filling
In a medium bowl, combine the cooled chicken mixture with 8 oz cream cheese, ½ cup heavy cream, ½ cup sour cream, ½ teaspoon black pepper, and 1 tablespoon cornstarch. Mix everything together until smooth and fully incorporated. The cornstarch helps create that ultra-creamy texture we're after.
Taste the mixture and adjust seasoning if needed—you might want to add a pinch more salt or taco seasoning to taste. This filling is the heart of your taquitos, so make sure it's rich, flavorful, and perfectly balanced. Once satisfied, cover the bowl and refrigerate for 15 minutes to let the flavors meld.
Assemble the Triple-Layered Taquitos
Preheat your oven to 425°F and line two baking sheets with parchment paper. Warm the 12 whole flour tortillas by microwaving them for 20-30 seconds or heating them in a dry skillet for 10 seconds per side. This makes them more pliable and less likely to crack when we roll them.
Spread 2 tablespoons of the creamy chicken mixture onto each tortilla, leaving about ½ inch border around the edges. Sprinkle ¼ cup shredded Monterey Jack cheese evenly over the filling, then add 1 tablespoon of the remaining 1 cup shredded cheddar cheese on top. Roll each tortilla tightly into a taquito, tucking in the sides as you go.
Place the completed taquitos seam-side down on the prepared baking sheets. Brush each one lightly with the 1 whole beaten egg (mixed with 1 tablespoon water for easier brushing), then sprinkle with the remaining ½ cup shredded cheddar cheese. This final layer ensures maximum crispiness and melty goodness.
Bake to Golden Perfection
Bake the taquitos for 15-18 minutes until they're deep golden brown and crispy. For even browning, flip them halfway through using tongs. You'll know they're ready when the cheese is bubbly and the edges are crispy—this is where that triple-layered crunch comes into play.
Remove from the oven and let them rest for 2 minutes before serving. The slight rest prevents the filling from oozing out when you cut into them. Serve immediately with your favorite dipping sauce—salsa, sour cream, or even guacamole will complement the creamy, cheesy goodness perfectly.
Optional Extra-Crispy Upgrade
For maximum crunch, transfer the baked taquitos to a wire rack set over a baking sheet and broil for 1-2 minutes on high. Watch them closely—they go from perfectly crispy to burnt in seconds. This step isn't necessary but takes your taquitos to the next level of texture contrast.
The secret to these taquitos is that creamy filling—don't skip the cornstarch or rush the chilling step. The combination of crispy tortilla, melty cheese layers, and rich chicken filling makes each bite irresistible. Enjoy your triple-layered crunch and melty cheese bliss!
Pro Tips For Making Baked Creamy Chicken Taquitos
- Pre-Cook the Chicken: Poach the chicken thighs in simmering water for 8-10 minutes before shredding—this guarantees tender, falling-apart meat that won’t turn rubbery when baked. I learned this the hard way after shredding dry, chewy thighs straight from the pan.
- Chill the Tortillas: Pop tortillas in the freezer for 10-15 minutes before rolling—this prevents them from getting soggy when stuffed with wet filling. Yes, it’s an extra step, but your taquitos will hold together like they’re supposed to.
- Mix Cream Cheese Cold: Use cold cream cheese straight from the fridge when making the sauce—it blends smoother and doesn’t turn the filling greasy. I used to melt it first, and the whole thing ended up too rich and gloppy.
- Bake Two Rounds: Roast the taquitos at 400°F for 15 minutes, then crank to 425°F for the last 10—this gets the cheese bubbly and the edges crisp without burning. The first batch I did at one temp, and the cheese just melted into a sad, stretchy mess.
Storing and reheating your baked creamy chicken taquitos
Refrigerator Storage
Store fully assembled but unbaked taquitos on a wire rack in the fridge for up to 24 hours before baking. This keeps them crispy when heated later. Wrap individual baked taquitos tightly in parchment paper and store in an airtight container for 3-4 days.
The filling stays creamy, but the outer layer may lose some crispiness after day 2. 🥶
Freezer Prep
For long-term storage, assemble taquitos completely (including egg wash and cheese topping) and freeze them on a parchment-lined tray for 1 hour. Transfer to a freezer bag with parchment between layers to prevent sticking.
They'll keep for 2 months. When ready to bake, skip thawing—bake straight from frozen at 400°F for 20-25 minutes.
Reheating Methods
Oven Method (Best for Crispiness): Place taquitos on a baking sheet and heat at 375°F for 10-12 minutes until golden and bubbly. The oven's dry heat restores that perfect crunch. Air Fryer Method: Cook at 375°F for 5-6 minutes, shaking halfway, for a quicker crispy result. Avoid microwaving—it makes the tortillas soggy.
Cheese Melting Tips
If your cheese looks dry after reheating, sprinkle 1 tablespoon milk over the taquitos and cover with foil for 2 minutes to restore creaminess. For extra melty goodness, add ¼ cup shredded cheese on top before reheating.
The Monterey Jack melts best, but Pepper Jack adds nice heat when reheated. Always preheat your oven to maintain texture consistency. 🧀
Make-Ahead Assembly
Prep the creamy chicken filling ahead and store it in an airtight container for up to 3 days. Keep tortillas wrapped in a damp towel in the fridge. Assemble taquitos just before baking—this prevents the tortillas from getting soggy.
For game day efficiency, assemble taquitos the night before, wrap them individually in plastic wrap, and refrigerate. Bake straight from cold for 18-20 minutes.
Nutrition facts
Frequently asked questions
Why do my taquitos get soggy instead of crispy?
This usually happens when the tortillas absorb too much moisture from the filling. To fix this, chill the creamy filling for 15 minutes before assembling to reduce moisture, and use cornstarch (1 tbsp) in the filling. Also, warm tortillas briefly before rolling to prevent cracking. Bake at 425°F for 15-18 minutes—don't overcrowd the pan!
Can I use chicken breast instead of thighs?
Yes, but thighs are ideal because they stay juicier during baking. If using breasts, cook them to 165°F and shred immediately to retain moisture. For extra tenderness, marinate the breasts in 1 tbsp lime juice and 1 tsp cumin for 30 minutes before cooking. The filling will still be creamy, but the texture may be slightly drier.
What's the best way to make these extra cheesy?
Add ¼ cup extra shredded cheese to the filling layer and sprinkle 2 tbsp extra cheese on top before baking. For a gooey center, use Pepper Jack or Colby Jack—they melt better than cheddar. Another trick: brush the baked taquitos with 1 tsp melted butter and broil for 30 seconds to create a golden, melty crust.
How do I keep the filling from leaking out?
Roll the taquitos tightly and tuck in the sides as you go. For extra security, chill the assembled taquitos for 10 minutes before baking—this helps the filling set slightly. If they still leak, reduce the filling amount to 1.5 tbsp per tortilla and bake at 400°F instead of 425°F to slow the cheese melting.
Are these good for meal prep?
Assemble taquitos ahead and store them in an airtight container for 3 days (unbaked) or 2 days (baked). For best results, bake straight from cold at 400°F for 20-25 minutes if frozen. Reheat baked ones in the oven at 375°F for 10 minutes to restore crispiness. Avoid microwaving—they'll get soggy!