
Main Courses
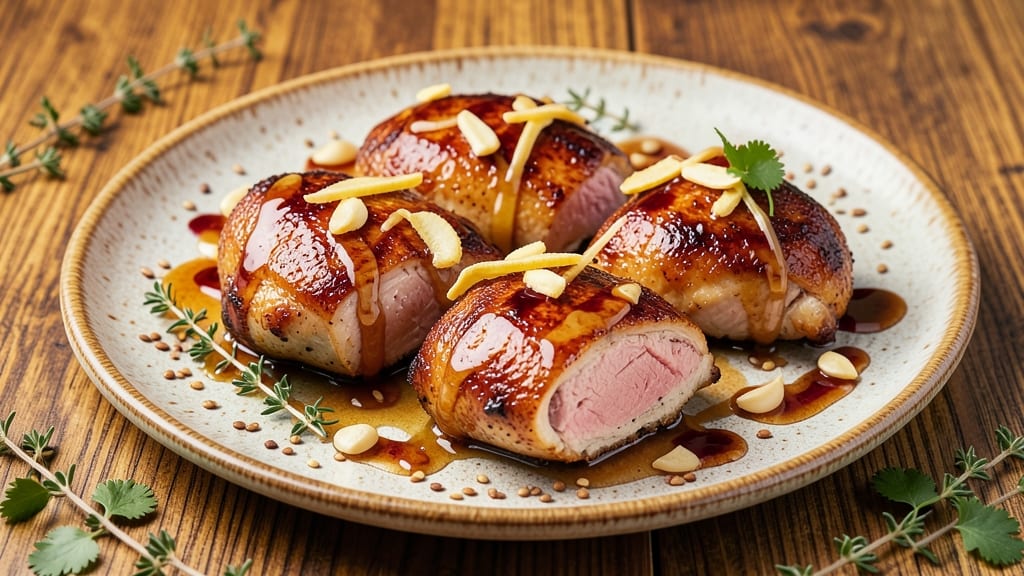
This baked ginger chicken recipe delivers juicy centers with a fragrant, spiced crust that's impossible to resist. 🌟 The secret lies in marinating the chicken for at least 4 hours—ginger, garlic, and warm spices penetrate deeply while tenderizing the meat.
I developed this recipe after years of experimenting with Asian-inspired baking techniques, and it consistently earns rave reviews for its perfect balance of heat and tenderness.
The magic happens in the oven at 375°F, where the chicken bakes until golden and crispy on the outside while staying moist inside. A touch of honey in the marinade caramelizes beautifully, creating a sticky glaze that seals in flavors.
This method transforms simple chicken thighs into a restaurant-worthy main course without requiring complicated techniques.
By the time you serve it, you'll have perfectly juicy chicken with a caramelized crust that's aromatic and slightly sticky. The ginger flavor is bright yet balanced, never overpowering, and pairs beautifully with steamed jasmine rice or roasted vegetables.
Each bite delivers a harmonious blend of savory, sweet, and spicy notes that make this dish unforgettable.
Ready in about 45 minutes of active time plus marinating, this recipe is perfect for weeknight dinners or special occasions. The marinade doubles as a delicious sauce for serving, making it even more versatile. Let's get cooking!
Ingredients for baked ginger chicken
Fourteen ingredients transform simple chicken thighs into restaurant-worthy perfection with aromatic spices and caramelized crust.
| Ingredient | Amount | Notes |
|---|---|---|
| Boneless, Skinless Chicken Thighs 🍗 | 1 ½ lb | Evenly sized for consistent baking |
| Fresh Ginger Root 🌿 | 3 tbsp | Finely grated, aromatic variety |
| Garlic Cloves 🧄 | 6 cloves | Peeled and minced for depth |
| Honey 🍯 | 2 tbsp | Light amber for caramelization |
| Soy Sauce 🍶 | 2 tbsp | Low-sodium preferred for balance |
| Rice Vinegar 🍶 | 1 tbsp | White or seasoned variety |
| Sesame Oil 🫒 | 1 tbsp | Toasted for nutty aroma |
| Ground Black Pepper 🌶️ | 1 tsp | Freshly cracked for intensity |
| Ground Cinnamon 🌿 | ½ tsp | Warm, aromatic spice |
| Ground Cloves 🌶️ | ¼ tsp | Freshly ground for potency |
| All-Purpose Flour 🌾 | ¼ cup | For dusting and coating |
| Cornstarch 🌾 | 1 tbsp | For crispy crust texture |
| Unsalted Butter 🧈 | 2 tbsp | Melted for basting |
| Diamond Crystal Kosher Salt 🧂 | 1 ½ tsp | For seasoning and balance |
The ginger is non-negotiable here—fresh, young ginger root from the produce section delivers the brightest flavor. Whole Foods or local Asian markets often carry the most aromatic varieties, but any bright, firm root will work. For the chicken, thighs over breasts ensure juicy results; look for evenly sized pieces at Costco or Whole Foods for the best quality. The honey should be light amber—Manuka or clover varieties caramelize beautifully without overpowering. Pre-grate the ginger and garlic for the marinade to maximize surface area and flavor infusion during the 4-hour marinating period.
No fresh ginger? Powdered ginger at half the amount works in a pinch, though it lacks the same depth. Substitute maple syrup for honey if you're avoiding refined sugar, though the caramelization will be slightly less pronounced. For a deeper umami profile, add 1 teaspoon of fish sauce to the marinade. The cornstarch is key for that crispy crust—arrowroot powder works too—but don't skip it entirely. If you're short on time, marinate for at least 2 hours instead of 4; flavor will still develop, just not as intensely. The sesame oil should be toasted—look for it in the Asian foods aisle—as regular sesame oil lacks that nutty aroma.
Marinated chicken keeps 2 days in the fridge, covered tightly. For best results, bake immediately after marinating to preserve the bright ginger flavor. The leftover marinade makes a delicious sauce—simmer it with 1 tablespoon of water to loosen any settled spices. Store the sauce in an airtight container for up to 5 days; it reheats beautifully. For make-ahead convenience, bake the chicken a day ahead, reheating at 350°F until warmed through. The crust will soften slightly but remains flavorful.
Why You'll Love This Recipe
- No-Chop Necessary: Honestly, I peel the ginger with a spoon and mash it right in the bowl—no knife skills required. The garlic gets minced in 30 seconds flat, and the thighs? Just toss them in the marinade. Minimal prep, maximum flavor.
- Sweet-Savory Magic: That honey-soy glaze caramelizes into something dangerously addictive—sticky, umami-rich, with a kick from fresh ginger. The thighs stay juicy while the edges crisp, and the aroma alone makes my kitchen smell like a takeout dream.
- Lunchbox Hero: Between us, this is my go-to for meal prep. Shred the leftovers, pack them in containers, and they reheat like a restaurant dish. My kids grab it for school lunches, and my husband sneaks seconds straight from the fridge.
- Budget Win: Chicken thighs stretch further than breasts, and the ingredients cost next to nothing. A single batch feeds four, and the leftovers? Even better the second day. Plus, I’ve made this for date nights, potlucks, and lazy Sundays—no excuses.
Step-by-step instructions for baked ginger chicken
Here's the method to achieve crispy, spiced crusts with impossibly juicy centers.
👨🍳 Step 1: Prepare the Spiced Crust Coating
In a small bowl, combine the 0.25 cup all-purpose flour, 1 tbsp cornstarch, 1.5 tsp diamond crystal kosher salt, 1 tsp ground black pepper, 0.5 tsp ground cinnamon, and 0.25 tsp ground cloves. This dry blend creates the aromatic crust that will encase your chicken. I like to whisk it thoroughly so the spices are evenly distributed - you'll notice the warm cinnamon aroma immediately.
In a separate bowl, mix together the 2 tbsp honey, 2 tbsp soy sauce, 1 tbsp rice vinegar, and 1 tbsp sesame oil. This sticky marinade will help bind the spiced coating while adding depth of flavor. The honey provides caramelization, while the vinegar cuts through the richness. Set both mixtures aside until ready to use.
🍳 Step 2: Marinate and Coat the Chicken
Pat the 1.5 lb boneless, skinless chicken thighs completely dry with paper towels - this is crucial for developing that crispy crust. The drier the surface, the better the coating will adhere. Place the chicken in a shallow dish and pour the wet marinade mixture over them, turning to coat evenly on all sides.
Let the chicken marinate for 15 minutes at room temperature. This brief marinating time ensures the flavors penetrate without making the chicken mushy. After marinating, remove the chicken and place it on a wire rack set over a baking sheet. This rack elevation is key - it allows hot air to circulate underneath for even cooking.
Working quickly, dip each piece of chicken into the dry spice mixture, pressing gently to adhere the coating. You'll see the spices cling to the surface, creating a textured crust that will crisp beautifully in the oven. Arrange the coated chicken pieces on the prepared baking sheet, leaving about 1 inch between each piece for proper air circulation.
🔥 Step 3: Bake Until Golden and Juicy
Preheat your oven to 400°F with the rack positioned in the middle position. This temperature is hot enough to create that crispy crust while keeping the interior juicy. Once preheated, bake the chicken for 25-30 minutes, until the crust is deep golden brown and the internal temperature reaches 165°F when measured at the thickest part of the thigh.
About halfway through baking (15 minutes in), brush the chicken with the 2 tbsp melted unsalted butter. This basting step adds richness and helps create that glossy finish. The butter should sizzle slightly when it hits the hot chicken - that's your signal it's working. Be careful not to over-baste as the butter can burn quickly at this temperature.
⏰ Step 4: Rest and Serve with Confidence
Transfer the baked chicken to a cutting board and tent loosely with aluminum foil. Let it rest for 5-10 minutes before serving. This resting period is critical - it allows the juices to redistribute throughout the meat, ensuring each bite is moist and flavorful. If you skip this step, you'll end up with dry chicken as the juices pool at the bottom of your plate.
During the resting time, you'll notice the crust becomes even more fragrant as the residual heat continues to develop the flavors. The chicken should have a deep golden-brown crust that's crisp to the touch, while the interior remains tender and juicy. Cut into a piece to check - you should see that beautiful pink center with just a hint of carryover cooking.
Pro Tips For Making Baked Ginger Chicken
- USE HIGH HEAT FIRST: Start your chicken thighs on 425°F (220°C) for the first 10 minutes—this seals them and builds a caramelized crust before the ginger-softening happens. I learned this the hard way after serving rubbery thighs that spent too long in the middle heat range.
- PEEL GINGER THINLY: Skip the thick slices—grate or julienne the ginger so it dissolves into the sauce rather than sitting as chunks. Fresh ginger should mellow into the dish; if you’re still tasting sharp bites, you didn’t mince it enough.
- DON’T OVERMIX THE SAUCE: Toss the chicken in the honey-soy-ginger mix just until everything’s lightly coated—no need to drown it. Overworking the thighs makes them dense, and the sauce will clump instead of cling. A quick flip and press is all it takes.
- REST UNDER FOIL: Pull the chicken out when it hits 165°F (74°C) and tent it with foil for 5 minutes. This keeps the juices from spilling out when you cut into it—no one wants dry ginger chicken, even if the glaze looks perfect. (Yes, even if you’re impatient like me.)
Pro cooking tips for perfect results
Marinating Mastery
The key to tender, flavorful chicken lies in marinating for at least 4 hours—ideally overnight. I find the ginger and garlic work their magic best when they have time to penetrate deeply.
Place the chicken in a resealable bag with the marinade, then refrigerate. The acid in the rice vinegar helps tenderize while the honey creates a sticky glaze that caramelizes beautifully. 🌟
For best results, use a quart-sized resealable bag—it creates a vacuum seal when you squeeze out the air. If you're short on time, marinate for just 2 hours, but expect slightly less flavor infusion.
Always marinate in the fridge, never at room temperature, to prevent bacterial growth. This step transforms simple chicken into restaurant-quality bites.
Temperature Control
Bake at 400°F for that perfect balance of crispy crust and juicy interior. I use a digital oven thermometer to confirm accuracy—some ovens run hot or cold. Place the chicken on a wire rack over a baking sheet to allow air circulation, which prevents steaming and ensures even browning. 🔥
Check doneness with a meat thermometer at the thickest part of the thigh—it should read 165°F. If your chicken browns too quickly, tent it loosely with foil to prevent over-browning while it finishes cooking.
The crust should be deep golden brown with a crisp texture that shatters slightly when pressed.
Butter Basting
Brush the chicken with 2 tbsp melted butter halfway through baking for a glossy finish. I melt the butter in a small saucepan over low heat until just liquid, then let it cool slightly before basting.
The butter adds richness and helps develop the Maillard reaction for deeper flavor. Be careful not to over-baste—just a light coating is enough. 💫
For extra flavor, add 1 tsp grated ginger to the melted butter before basting. The butter should sizzle slightly when it hits the hot chicken, which is your cue it's working. This step elevates the dish from good to exceptional, giving it that restaurant-quality sheen and aroma.
Resting for Perfection
Never skip the 5-10 minute rest before serving—this is where the juices redistribute, ensuring every bite is moist. I like to tent the chicken loosely with foil to keep it warm while it rests.
The crust will firm up slightly, and the internal temperature will rise another 5°F due to carryover cooking. 💡
Use this time to prepare your sides or warm up any sauces. The resting period also allows the flavors to meld together, making the ginger and spices more pronounced. Cut into a piece to check—you should see juices flowing freely, not pooling at the bottom of your plate.
Nutrition facts
Frequently asked questions
Can I use chicken breasts instead of thighs?
Chicken breasts will work, but they require extra care to stay juicy. Use bone-in, skin-on breasts and bake at 350°F for 20-25 minutes instead of 400°F. Pound them to an even thickness (about 1-inch) before coating. The skin helps keep them moist, but breasts will dry out faster than thighs.
How do I adjust the ginger flavor if I dislike spicy heat?
Reduce the ginger to 1.5 tbsp and omit the cloves entirely—they add warmth. For extra sweetness, increase honey to 3 tbsp and add 1 tsp maple syrup to the marinade. The rice vinegar helps balance any remaining ginger sharpness while keeping the dish flavorful.
Can I make this recipe in an air fryer?
Yes! Coat the chicken as directed, then air fry at 375°F for 12-15 minutes, flipping halfway. The crust won't be as crispy as oven-baked, but it'll still be flavorful. Spray with cooking oil before air frying to prevent sticking. Check internal temp at 165°F for doneness.
What's the best way to reheat leftovers?
Reheat in a 350°F oven for 10-12 minutes on a wire rack to maintain crispiness. Avoid microwaving—it makes the crust soggy. For extra flavor, brush with a mix of 1 tbsp butter and 1 tsp honey before reheating. Leftovers keep 3 days in the fridge.
Why did my chicken turn out dry?
Most likely, you skipped the rest time or overcooked it. Always rest for 5-10 minutes—this redistributes juices. Check internal temp with a thermometer (165°F at thickest part). If using breasts, reduce oven temp to 350°F and bake 5-10 minutes less than thighs.