
Main Courses
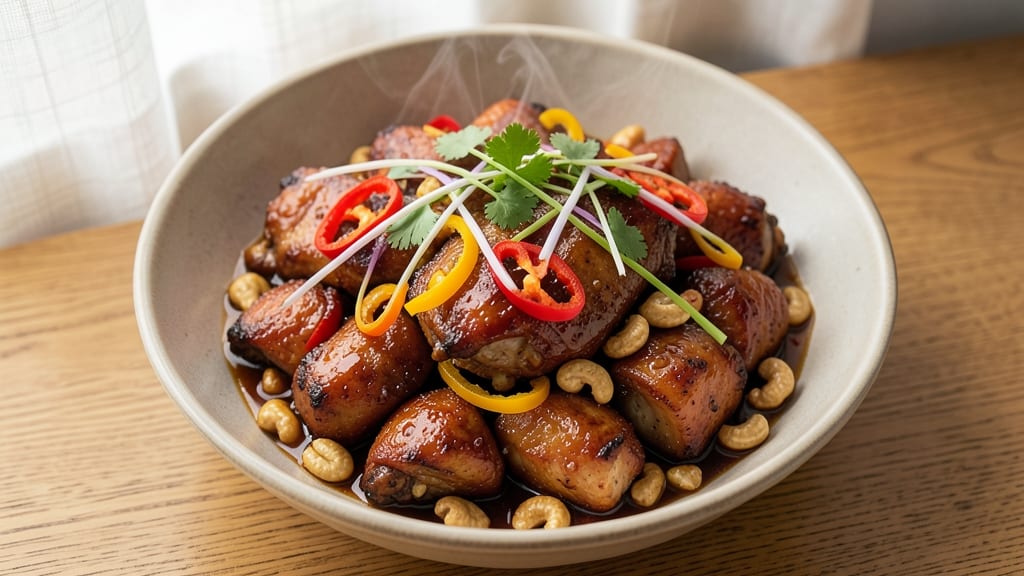
This baked kung pao chicken recipe reimagines the classic stir-fry as crispy, oven-baked bites that deliver all the spicy-sweet magic without the wok. The secret lies in a 375°F bake that creates restaurant-quality texture while keeping prep simple—no deep-frying required.
I developed this version after struggling to replicate wok-hei at home, and the result is a dish that balances authentic flavors with foolproof technique.
What sets this apart is the crispy chicken pieces coated in a sticky-sauce glaze that caramelizes beautifully in the oven. Traditional kung pao relies on high-heat stir-frying, but this baked method achieves the same addictive texture through proper breading and baking time.
The sauce—sweet, spicy, and nutty—infuses every bite while the chicken stays juicy inside. It's the perfect fusion of technique and tradition.
By the time you pull these golden pieces from the oven, you'll have a dish that's crispy on the outside, tender inside, and packed with that signature kung pao flavor profile.
The sauce clings perfectly to each bite, delivering bursts of heat and sweetness with every forkful. This is comfort food that feels special enough for company but simple enough for weeknights.
Serve over steamed jasmine rice or with stir-fried bok choy for the full experience. The leftovers reheat beautifully too—just a quick warm in the oven to restore that crispy texture. Let's get started on this modern take on a classic.
Ingredients for baked kung pao chicken
Crispy chicken meets bold, sticky-sweet sauce—authentic kung pao flavors with foolproof oven technique.
| Ingredient | Amount | Notes |
|---|---|---|
| Boneless, Skinless Chicken Thighs 🍗 | 1 ½ lb | Cut into 1-inch pieces |
| All-Purpose Flour 🌾 | 1 cup | For breading texture |
| Cornstarch 🌾 | ¼ cup | For extra crispiness |
| Kosher Salt 🧂 | 1 tbsp | Diamond Crystal preferred |
| Ground Black Pepper 🌶️ | 1 tsp | Freshly ground preferred |
| Garlic Powder 🧄 | 1 tbsp | For aromatic depth |
| Ginger Powder 🌿 | 1 tsp | Or 1 tbsp fresh grated |
| Sesame Oil 🫒 | 1 tbsp | For authentic flavor |
| Vegetable Oil 🫒 | ½ cup | For frying breading |
| Soy Sauce 🥫 | ½ cup | Low-sodium preferred |
| Rice Vinegar 🍶 | ¼ cup | For tangy balance |
| Honey 🍯 | ¼ cup | For sweet-spicy contrast |
| Sichuan Peppercorns 🌶️ | 1 tsp | Toasted and crushed |
| Red Chili Flakes 🔥 | 1 tbsp | Adjust for heat preference |
| Roasted Peanuts 🥜 | ½ cup | Chopped for texture |
The chicken thighs are non-negotiable here—they stay juicy while the skin renders crispy. Look for well-marbled thighs at the butcher counter or pre-cut packages at Whole Foods. For the breading, the cornstarch is key—it creates that signature wok-like crunch without frying. Penzeys carries excellent Sichuan peppercorns if you want to source them authentically, but the pre-ground versions at Asian markets work perfectly too. Toast them lightly in a dry pan before grinding for maximum aroma.
No Sichuan peppercorns? Substitute with extra red chili flakes and a pinch of black pepper for heat, though you'll lose that signature numbing sensation. The honey can be swapped for maple syrup if you're avoiding refined sugar, but local raw honey adds subtle floral notes that complement the dish beautifully. For the peanuts, Trader Joe's sells pre-chopped roasted peanuts that save time, but toasting your own dry-roasted peanuts in a skillet until fragrant elevates the dish. The sauce ratio is precise—don't skip the rice vinegar, as it cuts through the sweetness and balances the heat.
Prep the chicken and sauce components ahead, but bread the pieces just before baking to maintain crispiness. Store breaded chicken pieces on a wire rack in the fridge for up to 24 hours before baking—they'll stay crunchy. The sauce can be made 3 days ahead and reheated gently. For leftovers, a 5-minute broil restores that crispy exterior. Freeze unbaked breaded chicken for 2 months—just add 5 minutes to baking time when reheating.
Why You'll Love This Recipe
- Same recipe, two vibes: Serve it over rice for a quick dinner or pile it onto lettuce wraps for a crowd-pleasing appetizer. My roommates don’t even know when I’m winging it.
- One-Pan Magic: I swear by this for lazy nights—just toss the thighs in a bowl with flour, cornstarch, and salt, then dump them straight onto a sheet pan. No pans to wash, no mess to clean.
- Crispy-Creamy Payoff: That double-dusting with flour and cornstarch? It delivers a shatteringly crisp exterior while keeping the inside juicy. Honestly, the texture alone makes it worth baking instead of frying.
- Weeknight to Party: Same recipe, two vibes: Serve it over rice for a quick dinner or pile it onto lettuce wraps for a crowd-pleasing appetizer. My roommates don’t even know when I’m winging it.
Step-by-step instructions for baked kung pao chicken
Here's the method for achieving that signature crispy exterior and spicy-sweet balance without deep-frying.
Prepare the Chicken and Breading Mixture
Cut the 1.5 lb boneless, skinless chicken thighs into 1-inch pieces—uniform size ensures even cooking. In a large bowl, whisk together the 1 cup all-purpose flour, 0.25 cup cornstarch, 1 tbsp kosher salt, 1 tsp ground black pepper, 1 tbsp garlic powder, and 1 tsp ginger powder. The cornstarch is key here; it creates that signature crispy texture when baked.
Toss the chicken pieces in the dry mixture until fully coated, shaking off any excess. Transfer to a plate and let sit for 10 minutes—this resting period helps the breading adhere better. For extra flavor, lightly brush the chicken with 1 tbsp sesame oil before baking. This step is where the magic begins—proper coating ensures those crispy, golden bites we're after.
Bake for Maximum Crispiness
Preheat your oven to 425°F and line a baking sheet with parchment paper. Arrange the breaded chicken pieces in a single layer, leaving ½-inch space between each piece for even air circulation. Bake for 20-25 minutes, flipping halfway through, until the chicken reaches an internal temperature of 165°F and the breading is deep golden brown. The high heat is crucial—it creates that satisfying crunch while keeping the meat juicy.
Don't peek too early; opening the oven door causes temperature fluctuations that can lead to uneven cooking. If the breading starts browning too quickly, tent the pan with foil for the last 5 minutes to prevent burning while still achieving crispiness.
Make the Spicy-Sweet Sauce
While the chicken bakes, combine 0.5 cup soy sauce, 0.25 cup rice vinegar, 0.25 cup honey, 1 tsp toasted and crushed Sichuan peppercorns, and 1 tbsp red chili flakes in a saucepan. Bring to a simmer over medium heat, stirring constantly for 5-7 minutes until the sauce thickens slightly and coats the back of a spoon. The Sichuan peppercorns add that signature numbing heat, while the honey balances the acidity from the vinegar.
Taste and adjust seasoning—add a pinch more chili flakes if you prefer extra heat, or a splash more honey if you want more sweetness. The sauce should be glossy and well-balanced, ready to coat the crispy chicken perfectly.
Combine and Finish
Once the chicken is fully baked, transfer it to a serving dish. Pour the spicy-sweet sauce over the top and toss gently to coat. Sprinkle with 0.5 cup chopped roasted peanuts for added texture and crunch. The peanuts not only add a satisfying bite but also complement the savory-spicy flavors of the dish.
Let the chicken rest for 5 minutes before serving—this allows the juices to redistribute, ensuring each bite is moist and flavorful. Serve immediately with steamed rice to soak up every last bit of that delicious sauce.
Pro Tips For Making Baked Kung Pao Chicken
- CRISP THE THIGHS FIRST: Cut your chicken thighs into 1-inch chunks, then toss them in a mix of 2 tablespoons cornstarch and 1 teaspoon salt before baking. I learned this the hard way—skipping the pre-bake step leaves you with soggy, flavor-soaked meat instead of that crispy texture you crave.
- DON’T SKIP THE DOUBLE COAT: After baking the chicken, pull it out and let it cool for 5 minutes. Then, toss it in a fresh mix of 1 tablespoon flour and ½ teaspoon pepper—this second coating locks in that dry, crispy crust that makes all the difference when you toss it in the sauce.
- WATCH THE OVEN TEMP: Bake the chicken at 425°F (220°C) for 20 minutes, but resist the urge to peek. Opening the oven early lets heat escape and turns your crispy chicken into a sad, uneven mess. If you’re impatient, set a timer and walk away—your future self will thank you.
- USE COLD FRYER OIL: For that restaurant-style crunch, chill your oil (about 2 tablespoons) in the fridge for 10 minutes before tossing the baked chicken in it. Cold oil clings better and creates a lighter, more even coating than room-temperature oil—yes, even if you’re baking, not frying.
Regional styles of this dish
Sichuan-Inspired Original
This version stays true to the Sichuan province roots, where kung pao originated. The key difference is using dried red chilies (not flakes) for the sauce, which adds smoky depth. I toast 6-8 dried red chilies in a dry pan until fragrant, then crush them with the Sichuan peppercorns.
For extra authenticity, add 1 tbsp fermented black beans (found in Asian markets) to the sauce—they bring a funky umami that balances the heat. Serve with steamed bok choy and jasmine rice for the full Sichuan experience. 🌶️
Cantonese Fusion Twist
The Cantonese take on kung pao swaps Sichuan peppercorns for white pepper and adds a touch of hoisin sauce to the glaze. I mix 1 tbsp hoisin into the sauce along with 1 tsp five-spice powder for warmth.
For the chicken, use boneless chicken breast instead of thighs to keep it lighter. Garnish with scallions and sesame seeds instead of peanuts. This version pairs beautifully with egg fried rice or char siu bao (Chinese BBQ buns). 🥢
Thai-Inspired Heat
For a Thai-inspired version, boost the heat with bird's eye chilies and add fish sauce to the sauce. I replace the soy sauce with 0.3 cup fish sauce and add 1 tbsp palm sugar (or brown sugar) for depth.
Toss the baked chicken with 1 tbsp lime juice before serving. Top with crushed peanuts and fresh Thai basil for a fragrant finish. This version works perfectly with coconut rice or sticky rice for a Southeast Asian twist. 🌶️🔥
Korean BBQ Style
This Korean-inspired adaptation uses gochujang (Korean chili paste) instead of Sichuan peppercorns. I mix 2 tbsp gochujang into the sauce along with 1 tbsp soy sauce and 1 tsp sesame oil. For the chicken, marinate the pieces in 1 tbsp gochujang before breading.
After baking, drizzle with sesame seeds and green onions. Serve with kimchi and steamed white rice for a bold, umami-packed meal. 🌿
Vegetarian Adaptation
For a vegetarian version, replace the chicken with extra-firm tofu pressed and cubed, or mushroom stems (like shiitake or oyster). I marinate the tofu in 1 tbsp soy sauce and 1 tsp cornstarch before breading. The sauce remains the same, but I add 1 tsp miso paste for extra umami.
Toss the baked tofu in the sauce and garnish with toasted cashews (instead of peanuts) and cilantro. Serve with tofu scramble or edamame for a complete meal. 🌱
Spicy-Sweet Glaze Upgrade
Take the sauce to the next level by adding a caramelized glaze. After simmering the sauce, remove it from heat and stir in 1 tbsp butter and 1 tbsp honey. Return to low heat and cook until glossy and slightly thickened.
For extra richness, add 1 tsp toasted sesame oil at the end. This glaze clings beautifully to the chicken, creating a sticky, irresistible coating. 💛
Nutrition facts
Frequently asked questions
Can I use chicken breast instead of thighs?
Chicken breast works but requires extra care to stay juicy. Cut it into ½-inch thick pieces and bake at 375°F for 15-18 minutes (instead of 20-25). The cornstarch breading helps retain moisture, but breasts dry out faster. For best results, brined in ¼ cup soy sauce + 1 cup water for 30 minutes before breading.
How do I adjust the heat level?
For milder heat, reduce red chili flakes to ½ tbsp and omit Sichuan peppercorns (substitute with ¼ tsp extra black pepper). For extra spice, add 1 tsp cayenne pepper or 1 chopped fresh chili to the sauce. Remember: Sichuan peppercorns add heat AND a numbing sensation—use them sparingly if sensitive to tingling.
Why is my chicken soggy instead of crispy?
Soggy chicken usually means steam built up during baking. Fix this by:
- Pat chicken pieces very dry before breading,
- Arrange them ½-inch apart on the baking sheet, and
- Bake at 425°F (not lower heat). For extra crispiness, broil for 1-2 minutes at the end. The cornstarch is crucial—don't skip it!
Can I make this ahead of time?
Yes! Bread the chicken up to 24 hours ahead and refrigerate on a wire rack (not stacked). Bake straight from cold, adding 5 minutes to the time. The sauce can be made 3 days ahead and reheated gently. For leftovers, a 5-minute broil restores crispiness. Freeze unbaked breaded chicken for 2 months—just add 5 minutes to baking time when reheating.
What are good sides for this dish?
Classic pairings include steamed jasmine rice or egg fried rice to soak up the sauce. For freshness, try stir-fried bok choy or cucumber salad with rice vinegar. Heartier options: garlic green beans or mandarin orange chicken (another Asian-inspired dish). The peanuts in this recipe make it great with coconut rice too!