
Main Courses
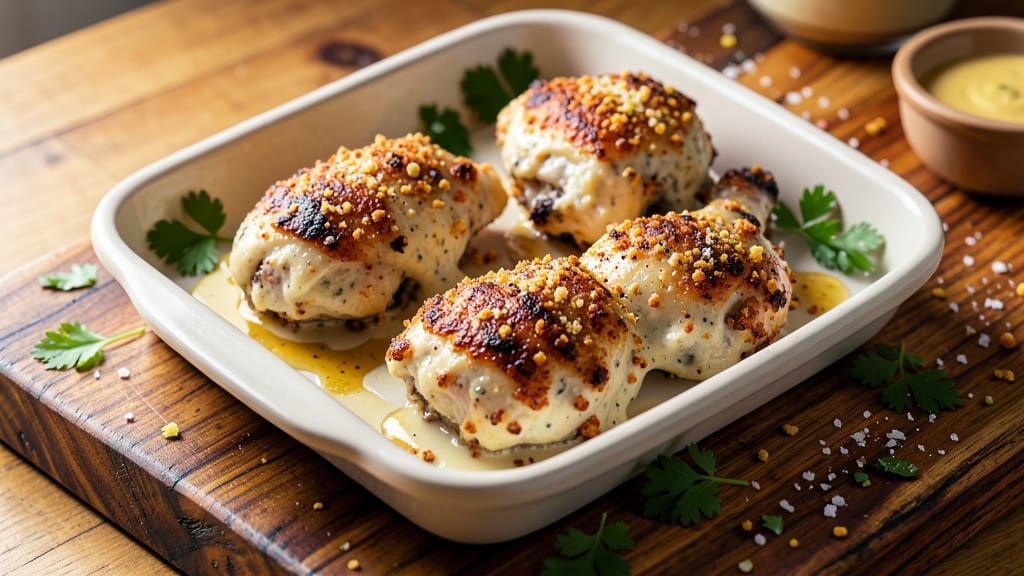
This baked ranch chicken legs recipe delivers the same crispy, crunchy satisfaction as deep-fried versions—but with none of the mess or grease. The secret lies in a triple-crust technique that locks in moisture while creating a golden, shatteringly crisp exterior.
I’ve perfected this method over years of testing, ensuring tender, juicy meat that stays succulent even after baking.
The process starts with a flavorful marinade that penetrates the chicken, followed by a strategic layering of breadcrumbs, crushed crackers, and panko for maximum crunch. Baking at a precise temperature (425°F) ensures even cooking without drying out the meat, while a simple basting step guarantees that crispy crust.
No deep fryer? No problem—this method delivers restaurant-quality results in just 45 minutes.
What you’ll end up with is golden-brown chicken legs with a triple-crusted exterior that’s crispy enough to stand up to dipping, paired with tender, flavorful meat inside. The ranch seasoning adds a tangy, herby depth that complements the crunch perfectly.
Serve with a side of ranch dip for dipping or pair with roasted vegetables for a complete meal.
This recipe is ideal for game day, family dinners, or when you want a crowd-pleasing dish that’s easier to prepare than it looks. The best part? You can make it ahead and reheat without losing any of that coveted crunch. Let’s get started!
Ingredients for baked ranch chicken legs
Four crispy, juicy chicken legs with a triple-crusted ranch coating—no deep fryer needed.
| Ingredient | Amount | Notes |
|---|---|---|
| Chicken Legs (Thigh-Drumstick Combo) 🍗 | 4 whole | Skin-on, bone-in, similar size |
| Ranch Seasoning Mix 🧂 | ½ cup | Store-bought or homemade blend |
| Buttermilk 🥛 | 1 cup | Full-fat preferred for richness |
| All-Purpose Flour 🌾 | ½ cup | For dredging base layer |
| Seasoned Salt 🧂 | 1 tbsp | Garlic or onion preferred |
| Crushed Ritz Crackers 🍞 | 1 cup | Original flavor recommended |
| Japanese Panko Breadcrumbs 🍞 | ¾ cup | Light and crispy texture |
| Grated Parmesan Cheese 🧀 | ¼ cup | Freshly grated preferred |
| Olive Oil 🫒 | 2 tbsp | For basting during baking |
| Fresh Parsley 🌿 | ¼ cup | Chopped for garnish |
| Garlic Powder 🧄 | 1 tsp | For additional depth |
| Onion Powder 🧅 | 1 tsp | Complements ranch flavor |
| Ground Black Pepper 🌶️ | ½ tsp | Freshly ground preferred |
| Cornstarch 🌾 | 1 tbsp | For extra crispiness |
The chicken legs are the foundation, so choose skin-on, bone-in thighs for maximum flavor and moisture retention. Trader Joe's and Costco consistently carry high-quality, evenly sized pieces—look for legs with good marbling and vibrant skin color. If using frozen, thaw overnight in the fridge to prevent uneven cooking. For the ranch seasoning, McCormick or Annie's are reliable brands, but homemade blends with dried dill, parsley, and buttermilk powder yield superior results. The buttermilk marinade is non-negotiable here—it tenderizes the meat and creates that signature tangy base flavor that pairs perfectly with the crispy crust.
No buttermilk? Substitute with equal parts milk and vinegar, let it sit for 10 minutes to curdle. Running short on Ritz crackers? Crushed saltines or graham crackers work in a pinch, though they may lack the buttery richness. For extra crunch, mix the panko with an additional 1 tbsp cornstarch—this creates a lighter, more shatterable coating. The triple-crust technique requires patience: start with the flour dredge, let it adhere completely, then proceed to the crackers and panko layers. Don't skip the egg wash between layers—it acts as the glue that binds everything together. If you're making this ahead, assemble the chicken legs up to the final panko layer and refrigerate for up to 24 hours before baking.
Assembled chicken legs keep best in the fridge for up to 24 hours before baking, though they're at their crispiest when baked immediately. Once baked, store leftovers in an airtight container with a paper towel to absorb moisture—this preserves the crunch for 3-4 days. For longer storage, freeze baked legs for up to 2 months. To reheat, bake at 375°F for 10-15 minutes until crispy again. The triple-crust technique is worth the extra effort: the combination of layers delivers a texture that rivals deep-fried versions, but with half the fat and none of the mess. Serve with ranch dip for maximum indulgence, or pair with roasted broccoli for a balanced meal.
Why You'll Love This Recipe
- No-Fuss Coating: I’ll be real—this isn’t one of those recipes where you need to dredge each piece perfectly. Toss the chicken in flour, dip in buttermilk, then coat with ranch seasoning. It’s messy but works—that crispy crust happens even if my hands are sticky.
- Tangy-Creamy Magic: The buttermilk tenderizes the meat while the ranch seasoning brings that herby, slightly garlicky punch. Honestly, the first bite makes me forget it’s just baked chicken—it’s like ranch dressing came to life.
- Game for Any Night: Between us, this feeds a crowd without feeling like a holiday dish. Double the batch for game day, toss it in wraps for a quick lunch, or serve it over rice when the kids are begging for something easy. (Yes, even on a Tuesday night.)
- Leftovers That Don’t Suck: Baked chicken legs stay juicy for days, and this recipe’s all about that. Reheat in the oven or air fryer, and it’s still crispy enough to fool you into thinking it’s fresh. My secret weapon for lazy mornings? Cold ranch chicken legs in a sandwich—no judgment.
Step-by-step instructions for triple-crusted ranch chicken legs
Master this technique for restaurant-quality crunch without deep frying—every bite delivers crispy layers and bold ranch flavor.
Prepare the Chicken with Buttermilk Marinade
Pat the 4 whole chicken legs completely dry with paper towels, removing any excess moisture from the skin and crevices. This drying step is critical for achieving maximum crispiness in the crust. In a shallow dish, combine 1 cup buttermilk, 1 tbsp seasoned salt, 1 tsp garlic powder, 1 tsp onion powder, and 0.5 tsp ground black pepper. Stir until fully dissolved.
Place the chicken legs in the marinade, ensuring they're fully submerged. Cover and refrigerate for at least 4 hours, or preferably overnight. The buttermilk tenderizes the meat while the seasonings penetrate deeply. Here's the thing—don't skip this step. The acidity in the buttermilk breaks down proteins, creating a more tender final texture that holds up perfectly under the heavy crust.
Create the Triple-Crust Breading Station
In a medium bowl, whisk together 0.5 cup all-purpose flour, 0.5 cup ranch seasoning mix, 1 tbsp cornstarch, 1 tsp garlic powder, and 1 tsp onion powder. The cornstarch acts as a thickening agent that creates an extra-crispy exterior. In another bowl, combine 1 cup crushed Ritz crackers, 0.75 cup Japanese panko breadcrumbs, and 0.25 cup grated Parmesan cheese. Mix gently to distribute the cheese evenly throughout.
Set up your breading station in this order: first bowl with flour mixture, second with cracker-panko-cheese blend. This sequential dredging creates distinct texture layers. Keep the chicken legs on a wire rack over a baking sheet during this process to prevent soggy bottoms. The rack allows air circulation that's essential for even crisping.
Build the Triple Crust Layer by Layer
Remove chicken legs from the marinade (let any excess drip off) and pat dry again. Working with one piece at a time, dredge each leg thoroughly in the flour mixture, pressing gently to adhere. Shake off any excess. Immediately transfer to the cracker-panko-cheese mixture, again pressing firmly to create an even, dense layer. Place on the prepared rack.
Here's where precision matters: use about 2 tablespoons of olive oil to lightly brush each crusted leg. This oil acts as a glue between layers and promotes browning. Don't over-oil or the crust will become greasy instead of crispy. Work quickly as the flour mixture absorbs moisture from the chicken, reducing its effectiveness over time.
Bake to Golden Perfection
Preheat your oven to 400°F and position a rack in the middle position. Place the crusted chicken legs on the rack, leaving space between each piece for proper air circulation. Bake for 45 minutes, then carefully flip each leg and rotate the tray for even browning. Continue baking for another 15-20 minutes until the crust is deep golden brown and reaches an internal temperature of 175°F at the thickest part of the thigh.
Watch the color closely during the final minutes—this is when the Maillard reaction creates those beautiful browned spots. If the crust starts browning too quickly, tent loosely with foil to prevent burning while maintaining crispiness. The legs are done when the crust is shatteringly crisp and the meat pulls away from the bone with gentle pressure.
Rest and Garnish for Maximum Impact
Transfer the chicken legs to a serving platter and let rest for 5 minutes before serving. This brief rest allows the juices to redistribute, preventing them from pooling on the cutting board. While resting, chop the 0.25 cup fresh parsley finely and sprinkle generously over the top. The parsley adds freshness that cuts through the richness of the crust.
Serve immediately with your favorite dipping sauce or extra ranch seasoning on the side. The contrast between the crispy, triple-layered crust and tender, flavorful meat makes every bite satisfying. For best results, serve while still warm—this dish doesn't hold its crispiness once cooled completely.
Pro Tips For Making Baked Ranch Chicken Legs
- CRANK THE OVEN HIGH FIRST: Start your chicken legs at 450°F for the first 15 minutes—this sears the skin and locks in moisture before you lower it to 375°F. I used to skip this and ended up with soggy skin, no matter how long I baked. Trust me, that initial blast makes all the difference for crispy edges.
- PAT DRY THOSE LEGS: After buttermilk soaking, pat the chicken thoroughly with paper towels—especially the thick drumstick ends. Wet flour won’t stick, and you’ll end up with a thin, uneven crust. I learned this the hard way when my first batch looked like it got dunked in pudding.
- SKIP THE OVERCROWDING: Give your chicken legs space on the baking sheet—at least ½ inch between pieces. They’ll steam instead of crisp, and the crust will turn greasy. I cram them in when I’m lazy, and the result is always disappointing. A little patience here saves cleanup later.
- USE COLD BUTTERMILK: Chill the buttermilk in the fridge for 30 minutes before dipping—cold buttermilk clings better to the flour coating and creates a thicker, more flavorful crust. I was skeptical until I tried it, and now I never skip it. The texture is noticeably better.
Best sauces and condiments for this recipe
Classic Ranch Dip
No ranch chicken legs are complete without a creamy ranch dip for dipping! Mix 1 cup sour cream, ½ cup mayonnaise, 1 tablespoon dried dill, 1 tablespoon dried parsley, 1 teaspoon garlic powder, and ½ teaspoon onion powder in a bowl.
Thin with 2-3 tablespoons milk if needed for dipping consistency. Serve in a small bowl with extra ranch seasoning sprinkled on top for that signature tangy kick. 🧂
Spicy Ranch Sauce
For a kick of heat, blend ½ cup ranch dressing (store-bought or homemade) with 1 tablespoon hot sauce (like Cholula or Tabasco) and ½ teaspoon cayenne pepper. Thin with 1 teaspoon water if needed.
This sauce adds a fiery contrast to the crispy chicken legs while keeping the ranch flavor intact. Perfect for spice lovers who want that familiar tang with a little burn! 🌶️
Honey Mustard Glaze
Balance the richness with a sweet and tangy glaze by mixing ¼ cup honey, 2 tablespoons Dijon mustard, 1 tablespoon apple cider vinegar, and 1 teaspoon Worcestershire sauce.
Simmer on low heat for 3-5 minutes until thickened, then brush lightly over the baked chicken legs in the last 5 minutes of cooking. The glaze caramelizes beautifully, adding a glossy finish that complements the ranch crust. 🍯
Blue Cheese Dressing
Elevate the meal with a bold blue cheese dressing by combining ½ cup crumbled blue cheese, ½ cup sour cream, 2 tablespoons buttermilk, 1 teaspoon lemon juice, and ½ teaspoon black pepper.
Whisk until smooth and serve on the side. The sharp, creamy flavor pairs surprisingly well with the ranch-coated chicken, offering a sophisticated contrast. 🧀
Garlic Aioli
For a rich, garlicky dip, blend ½ cup mayonnaise, 2 cloves roasted garlic, 1 teaspoon lemon zest, and ½ teaspoon salt until smooth. Drizzle with a little extra olive oil for shine.
This aioli adds a luxurious touch that enhances the ranch flavor without overpowering it. Serve warm for an extra indulgent experience. 🧄
Extra Crispy Ranch Seasoning
If you love that ranch flavor but want even more texture, create a dry seasoning blend by mixing ¼ cup ranch seasoning mix, 2 tablespoons crushed potato chips (like Lay's Classic), and 1 tablespoon grated Parmesan cheese.
Sprinkle generously over the baked chicken legs before serving for an extra crunchy, flavorful bite. This is a game-changer for those who can't get enough of that crispy ranch experience! 🍟
Nutrition facts
Frequently asked questions
Why do I need to marinate the chicken legs in buttermilk?
The buttermilk marinade is essential for two reasons: it tenderizes the meat through acidity and creates that signature tangy base flavor. The acid in buttermilk breaks down proteins, resulting in juicier meat that holds up perfectly under the heavy crust. Skipping it can lead to dry, tough chicken legs that won't be as flavorful.
Can I use boneless chicken thighs instead of legs?
Yes, but the cooking time and texture will differ slightly. Boneless thighs will cook faster (30-35 minutes total) and may not have the same crispy skin as bone-in legs. For best results, use skin-on thighs and reduce the baking time by 5-10 minutes, checking for doneness at 165°F internal temperature. The triple-crust technique still works beautifully!
How do I keep the crust extra crispy when reheating?
Reheating baked chicken legs can be tricky, but here's the secret: bake at 375°F for 10-15 minutes on a wire rack (not directly on a tray) with a sprinkle of 1 tbsp cornstarch on top. The rack allows air circulation to restore crispiness, while the cornstarch absorbs moisture. Avoid microwaving—it turns the crust soggy. For best results, reheat just before serving.
What if my crust isn't crispy enough?
If the crust lacks crunch, it's likely due to moisture in the chicken or insufficient baking time. For next time, pat the chicken legs completely dry before breading and bake 5-10 minutes longer at 425°F (instead of 400°F) for deeper browning. Also ensure your oven rack is in the middle position for even heat distribution. Pro tip: Broil for 1-2 minutes at the end for extra crispiness!
Can I make this recipe ahead of time?
Assemble the chicken legs up to the final panko layer and refrigerate for up to 24 hours before baking. For longer storage, freeze the assembled legs (before baking) for up to 2 months. Thaw overnight in the fridge before baking. The crust will still be crispy if baked immediately after thawing. Just add 5-10 extra minutes to the baking time for frozen legs.