
Main Courses
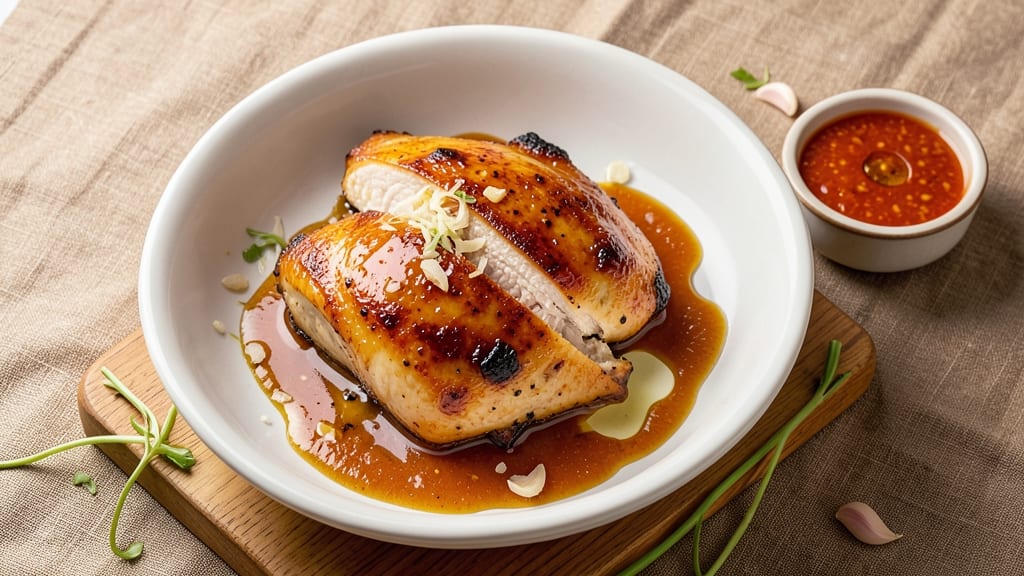
This baked sticky chicken breast recipe delivers perfectly moist, flavor-packed results every time—no dryness in sight. The secret lies in a simple honey-soy glaze that locks in juices while creating that signature caramelized crust.
I developed this method after years of battling dry baked chicken, and it now consistently produces tender, sticky-glazed breasts that taste restaurant-quality.
The process starts with a quick marinade that tenderizes the chicken, followed by baking at 375°F until the internal temperature reaches 165°F. The glaze—just honey, soy sauce, garlic, and a touch of ginger—simmers into a thick, sticky sauce that coats the chicken beautifully.
No complicated techniques required, just precise timing and a few simple ingredients.
What you end up with is chicken that's impossibly tender inside with a glossy, sticky glaze that clings to every bite. The sauce caramelizes slightly during baking, adding depth of flavor while maintaining that signature stickiness.
This recipe serves as a complete meal—pair it with steamed rice and roasted vegetables for a balanced, satisfying dinner.
The best part? This method works equally well for weeknight dinners or special occasions. The glaze keeps the chicken moist even when reheated, making leftovers just as delicious as the first serving. Let's get started on this foolproof baked chicken recipe that will change how you cook chicken breasts forever.
Ingredients for baked sticky chicken breast
The perfect balance of honey's sweetness and soy's umami creates that signature sticky glaze.
| Ingredient | Amount | Notes |
|---|---|---|
| Boneless, Skinless Chicken Breast 🍗 | 1 ½ lb | Even thickness preferred, pounded to 0.5-inch |
| Honey 🍯 | ½ cup | Pure, unprocessed for best caramelization |
| Low-Sodium Soy Sauce 🍶 | ⅓ cup | Kikkoman preferred for authentic flavor |
| Garlic Cloves 🧄 | 4 cloves | Minced for marinade and glaze |
| Fresh Ginger 🌿 | 1 tbsp | Grated, for aromatic depth |
| Extra-Virgin Olive Oil 🫒 | 1 tbsp | For marinade and glaze richness |
| Diamond Crystal Kosher Salt 🧂 | 1 tsp | For seasoning and glaze balance |
| Freshly Ground Black Pepper 🌶️ | ½ tsp | For subtle heat contrast |
| Cornstarch 🌾 | 1 tbsp | For glaze thickening (optional) |
| Sesame Oil 🫒 | 1 tsp | For finishing aroma (optional) |
| Green Onions 🧅 | 2 whole | Sliced for garnish |
| Fresh Cilantro 🌿 | ¼ cup | Chopped for garnish (optional) |
The chicken breast quality makes all the difference here. Look for plump, uniform pieces—thicker cuts stay juicier during baking. I prefer Trader Joe's or Whole Foods for their consistent quality, but any reputable grocer will do. Pounding the breasts to even thickness ensures even cooking, which is critical for that juicy interior. Organic chicken has slightly better flavor, but conventional works perfectly fine for this recipe. Avoid any pieces with excessive fat or discoloration, as these can affect the final texture and flavor.
No honey? Maple syrup or agave nectar work in a pinch, though they'll alter the caramelization slightly. The soy sauce can be swapped for coconut aminos or tamari if you're avoiding gluten, but the flavor profile will differ. Fresh ginger is ideal, but ground ginger at half the amount gets you close. For the olive oil, avocado oil has a higher smoke point if you're concerned about burning. The cornstarch is optional but helps thicken the glaze for better clinging—skip it if you prefer a runnier sauce. Sesame oil should only be added at the very end for aroma, not during cooking.
Marinate the chicken for at least 30 minutes (overnight is ideal) to maximize tenderness. The glaze can be prepped up to 2 days ahead and stored in the fridge, but reheat it gently before using. Baked chicken reheats beautifully—simply cover with foil and warm in a 350°F oven for 10-15 minutes. Leftovers keep for 4 days in the fridge or 3 months frozen. The glaze freezes well too, so you can make extra for other dishes like stir-fries or rice bowls.
Why You'll Love This Recipe
- One-Pan Magic: I swear by this—just toss the chicken, sauce, and aromatics on a sheet, bake, and walk away. No pots to scrub, no pans to wash. That sticky glaze? It practically melts into the oven like a lazy Sunday.
- Sweet-Savory Balance: The honey and soy sauce create this perfect marriage—caramelized edges with a deep umami kick. Honestly, the first time I made it, I ate half the batch straight from the pan. (Yes, even on a Tuesday night.)
- Meal Prep MVP: This keeps beautifully for days, whether you’re packing lunches or reheating for dinner. The glaze stays sticky, the chicken stays tender, and you’ll actually look forward to leftovers. My daughter picks out the pieces, but still asks for seconds.
- Budget-Friendly Protein: Chicken breast is lean and affordable, and this recipe stretches it further with the sticky sauce. Between us, I’ve fed four people for under $15, and no one complains about the flavor—or the fact that it’s ready in 30 minutes.
Step-by-step instructions for baked sticky chicken breast
This method transforms simple chicken breast into tender, caramelized perfection with minimal effort.
Prepare the Honey-Soy Marinade
In a medium bowl, whisk together the 0.5 cup honey, 0.33 cup low-sodium soy sauce, 1 tbsp extra-virgin olive oil, 1 tbsp grated fresh ginger, and 4 minced garlic cloves until fully combined. The mixture should be smooth with no visible ginger or garlic particles. This marinade forms the flavor base, so let it sit at room temperature for 5 minutes to allow the aromatics to meld.
Season the 1.5 lb boneless, skinless chicken breast with 1 tsp Diamond Crystal kosher salt and 0.5 tsp freshly ground black pepper on both sides. If the breast is thicker than 0.5-inch, pound it gently to an even thickness using a meat mallet or rolling pin. This ensures even cooking and prevents dryness in the center. Place the seasoned chicken in a resealable plastic bag and pour the marinade over it, coating all surfaces thoroughly. Seal the bag and marinate in the refrigerator for at least 1 hour, or up to 4 hours for deeper flavor penetration.
Create the Glaze and Prep the Chicken
In a small bowl, whisk together the 1 tbsp cornstarch and 1 tsp sesame oil. This mixture will help thicken the glaze and add a nutty aroma. Preheat your oven to 375°F and position a rack in the center position. Line a baking sheet with parchment paper or foil for easy cleanup.
Remove the chicken from the marinade (reserve the marinade for later) and pat it dry with paper towels. This step is critical—excess moisture on the surface prevents the glaze from caramelizing properly. Brush the chicken evenly with half of the reserved marinade, ensuring full coverage on all sides. The marinade should cling to the chicken like a sticky syrup, which will later form the signature glaze.
Bake the Chicken to Juicy Perfection
Transfer the chicken to the prepared baking sheet and bake for 20 minutes. After this initial baking period, brush the chicken again with the remaining marinade. This double application ensures a rich, glossy glaze that locks in moisture. Return the chicken to the oven and continue baking for an additional 15-20 minutes, or until the internal temperature reaches 165°F when measured with an instant-read thermometer in the thickest part of the breast.
The chicken is done when the glaze is deep amber and bubbling, and the edges are slightly caramelized. If the glaze sets too quickly, tent the chicken loosely with aluminum foil during the last 5 minutes of baking to prevent over-browning. The result should be tender, juicy chicken with a sticky, glossy exterior that clings to every bite.
Rest and Garnish for Presentation
Remove the chicken from the oven and let it rest on a wire rack for 5 minutes. This resting period allows the juices to redistribute throughout the meat, ensuring maximum moisture in every slice. While the chicken rests, slice the 2 whole green onions and 0.25 cup fresh cilantro into thin strips for garnish.
Serve the chicken immediately, drizzled with any remaining pan juices. Garnish with the sliced green onions and cilantro for a fresh contrast to the rich, caramelized glaze. The chicken should be fork-tender with a glossy, sticky exterior that clings to the meat like honey. For extra flavor, brush additional glaze over the top before serving.
Pro Tips For Making Baked Sticky Chicken Breast
- Pound the Chicken Evenly: I learned this the hard way—uneven pounding means uneven cooking. Use a meat mallet to tap the breasts to ¼-inch thickness (not paper-thin), then rotate 90 degrees and pound again. This keeps the sticky glaze from pooling in thick spots and ensures every bite is tender.
- Prep Ginger Like a Pro: Peeling and grating fresh ginger is a game-changer here. Use a microplane for fine, juicy shreds—no need to mince. Skip the zest (it’s bitter), but don’t skip the 1 teaspoon of grated ginger in the sauce; it’s what ties the honey and soy together. (Yes, even if you’re impatient like me.)
- Bake at 375°F, Not Higher: I used to blast these at 400°F for faster results, but the honey burns before the chicken cooks through. Stick to 375°F—it lets the glaze caramelize slowly while the center hits 165°F. If the edges brown too fast, tent loosely with foil midway.
- Deglaze the Pan First: Don’t just dump the sauce on raw chicken. After searing minced garlic in the pan (if you do that step), splash in 2 tablespoons of water and scrape up the browned bits. Reduce by half before adding honey and soy—this adds deep, savory depth the recipe often skips. (Your future self will notice.)
Perfect pairings for this recipe
Rice Pairings
Steamed jasmine rice is my go-to pairing—its delicate floral notes complement the sweet-savory glaze without overpowering it. Cook 1 cup jasmine rice with 1.5 cups water and a pinch of salt for fluffy grains that soak up the sticky sauce beautifully.
For extra flavor, stir in 1 tsp toasted sesame oil and 1 tbsp chopped green onions after cooking. 🍚
For a heartier option, try brown rice or forbidden black rice—both add earthy depth that balances the glaze’s sweetness. Cook 1 cup brown rice with 2 cups water for 45 minutes on low heat, then fluff with a fork. The nutty texture contrasts perfectly with the chicken’s glossy finish.
Vegetable Sides
Roasted bok choy brings a crisp, slightly bitter edge that cuts through the richness. Toss 2 bunches bok choy with 1 tbsp olive oil, ½ tsp salt, and ¼ tsp black pepper, then roast at 400°F for 12-15 minutes until wilted but still vibrant.
The steam from the chicken will enhance its natural sweetness. 🥦
For a lighter option, serve steamed snap peas with a sprinkle of toasted sesame seeds and a drizzle of ponzu sauce (mix 2 tbsp soy sauce, 1 tbsp rice vinegar, and 1 tsp grated yuzu or lemon).
The tangy brightness refreshes your palate between bites of sticky chicken.
Sauce Enhancements
Drizzle the chicken with spicy sriracha mayo for an extra kick—mix 2 tbsp mayonnaise with 1 tsp sriracha and a pinch of garlic powder. The creaminess balances the glaze’s stickiness while adding heat. For a smoky twist, top with crumbled bacon or chopped scallions right before serving. 🌶️
If you love umami, serve with miso-glazed mushrooms—sauté 8 oz shiitake mushrooms with 1 tbsp white miso paste, 1 tbsp honey, and 1 tsp mirin until caramelized. The deep, savory flavor mirrors the chicken’s glaze and creates a cohesive meal.
Beverage Pairings
A crisp green tea like japanese sencha complements the honey-soy glaze’s sweetness without overpowering it. The tea’s subtle bitterness and fresh aroma cleanse your palate between bites. For a non-alcoholic option, try sparkling yuzu soda—its citrusy fizz and slight tartness contrast the chicken’s richness. 🍵
For an adult pairing, a dry Riesling or sake** works beautifully. The Riesling’s acidity cuts through the glaze’s sweetness, while sake’s clean, umami notes enhance the soy and ginger flavors. Avoid heavy red wines—they’ll clash with the delicate balance of the dish.
Nutrition facts
Frequently asked questions
Why does this recipe guarantee juicy chicken?
The secret lies in the honey-soy marinade and baking technique. The honey acts as a natural humectant that locks in moisture, while the marinade tenderizes the chicken before baking. Baking at 375°F with a double glaze application creates a caramelized crust that seals in juices. Plus, the 5-minute rest after baking redistributes all the flavorful juices throughout the meat.
Can I make this recipe with boneless, skinless thighs instead?
Chicken thighs have more natural fat, which makes them more forgiving for baking. Increase the baking time by 5-10 minutes (until 175°F internal temp) and reduce the marinating time to 30 minutes since thighs don't need as long to tenderize. The sticky glaze will work beautifully on thighs too!
What if my glaze turns too thick before baking?
If your glaze thickens too quickly, simply whisk in 1-2 teaspoons of warm water to restore the right consistency. For extra insurance, mix the cornstarch with cold water first to create a slurry before adding it to the glaze. The key is to keep the glaze pourable but still thick enough to cling to the chicken.
How do I adjust this for air fryer cooking?
For an air fryer version, preheat to 375°F and spray the chicken lightly with oil. Cook for 12-15 minutes, flipping halfway, then brush with glaze and cook 3-5 more minutes until the internal temp reaches 165°F. The air fryer works well but requires closer monitoring to prevent over-browning.
Can I make this recipe ahead of time?
Yes! Cook the chicken up to 2 days ahead and store it in an airtight container in the fridge. Reheat by covering with foil and warming at 350°F for 10-15 minutes until heated through. The glaze actually improves when reheated, becoming even more flavorful. For freezing, wrap individual portions tightly and freeze for up to 3 months.