
Main Courses
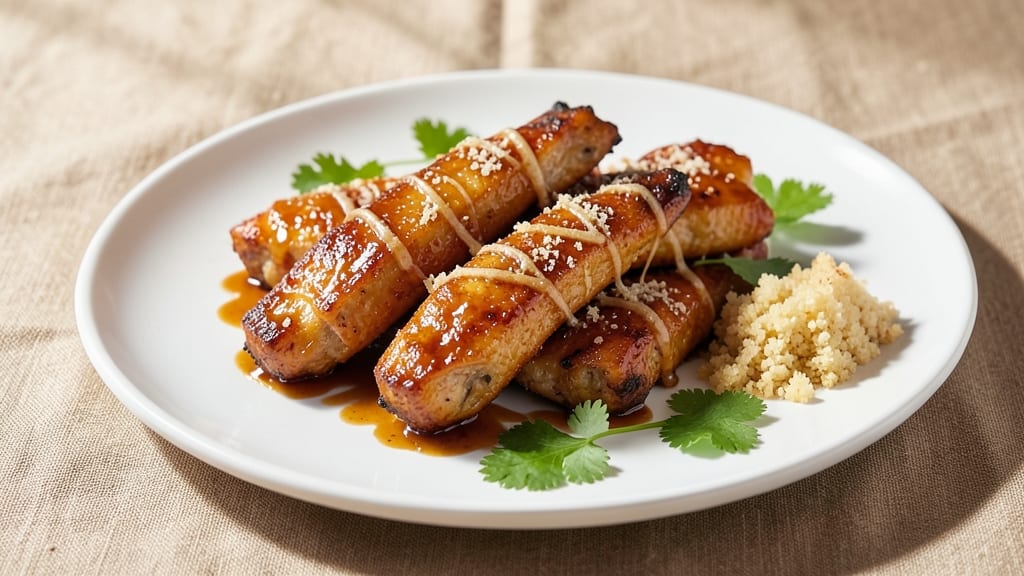
This baked teriyaki chicken tenders recipe delivers restaurant-quality results with a glazed crunch that's impossible to resist. 🔥 The secret lies in a simple marinade that tenderizes the chicken while building deep umami flavors, followed by a crispy baking technique that locks in juiciness.
I've perfected this method after years of testing—no deep-frying required, just oven magic that transforms ordinary chicken into something extraordinary.
The process is straightforward yet precise: chicken tenders get marinated in a blend of soy sauce, honey, and ginger for maximum flavor penetration, then coated in panko breadcrumbs for that signature crunch. Baking at the right temperature ensures perfectly tender meat with a caramelized glaze that's sticky-sweet and irresistible.
What you'll end up with is golden-brown tenders that stay crispy even after dipping, all while maintaining that juicy interior that keeps everyone coming back for more.
What makes these tenders special is how they balance texture and flavor—crispy on the outside, tender on the inside, with that perfect teriyaki glaze that's neither too sweet nor too salty. The marinade does most of the work, so even beginners can achieve professional results.
This recipe is designed to be your new go-to for weeknight dinners, game day appetizers, or a quick lunch that feels like a celebration.
Serve with a side of steamed vegetables or a fresh cucumber salad to balance the richness, and don't forget the dipping sauce—extra teriyaki glaze or a tangy honey mustard works perfectly.
The best part? These tenders reheat beautifully, making them ideal for meal prep. Let's get started on creating your new favorite dish!
Ingredients for baked teriyaki chicken tenders
Restaurant-quality crunch and sticky-sweet perfection start with these carefully chosen ingredients.
| Ingredient | Amount | Notes |
|---|---|---|
| Boneless, Skinless Chicken Breast 🍗 | 1 ½ lb | Cut into 1-inch thick strips |
| Japanese Panko Breadcrumbs 🍞 | 1 ½ cups | Light and crispy variety |
| Large Eggs 🥚 | 2 whole | Beaten for even coating |
| Extra-Fine Cornstarch 🌾 | ¼ cup | For extra crispiness |
| Soy Sauce 🥄 | ½ cup | Low-sodium preferred |
| Honey 🍯 | ⅓ cup | Wildflower for depth |
| Fresh Ginger 🧄 | 2 tbsp | Finely grated, aromatic |
| Garlic Cloves 🧄 | 4 cloves | Minced for marinade |
| Rice Vinegar 🍶 | 1 tbsp | For tangy balance |
| Sesame Oil 🫒 | 1 tbsp | Toasted for aroma |
| Diamond Crystal Kosher Salt 🧂 | 1 ½ tsp | For seasoning |
| Ground Black Pepper 🌶️ | ½ tsp | Freshly cracked |
| Vegetable Oil 🫒 | 2 tbsp | For greasing pan |
| Cornstarch 🌾 | 1 tbsp | For glaze thickening |
The chicken breast is critical—look for plump, uniform strips with minimal fat. Trader Joe's often has pre-cut tenders, but cutting your own ensures even cooking. Fresh ginger and garlic? Don't use jarred minced—the flavor difference is night and day. For the panko, Japanese brands like Nissin are worth the splurge—they're lighter and crispier than generic breadcrumbs. The honey should be wildflower or clover for that perfect balance of sweetness and depth.
No panko? Crush regular bread into fine crumbs and mix with an extra tbsp of cornstarch for crispiness. Substituting honey? Maple syrup works 1:1, but it's slightly less sticky. The sesame oil might be hard to find—toasted sesame oil from the Asian aisle is non-negotiable for that authentic aroma. If you're short on time, pre-marinate the chicken overnight for maximum tenderness. The cornstarch in the breadcrumb mix is what gives those tenders that signature crunch—don't skip it.
Marinated chicken keeps 2 days in the fridge, covered. For meal prep, bake and freeze unglazed tenders—just add the glaze when reheating. The glaze itself stays fresh for 1 week in the fridge, or 3 months frozen in ice cube trays. Pro tip: Reheat tenders at 350°F for 5 minutes to restore crispiness—microwaving makes them soggy.
Why You'll Love This Recipe
- No-Fuss Crispiness: I swear by the Japanese panko here—it’s lighter than regular breadcrumbs and gives those tenders that perfect crunch without frying. Just toss the chicken in egg, dredge in the mix, and bake. No flipping, no stress, just golden edges every time.
- Sauce That Sticks: That teriyaki glaze? It’s not just drizzled on top—it gets baked right into the chicken, so every bite has that sweet-savory punch. Honestly, the cornstarch in the coating helps it cling like glue, and the soy sauce cuts through the richness just enough to keep it balanced.
- Weeknight to Party Fix: Between us, these are my go-to for busy nights and when I need something impressive for guests. Serve them with rice and steamed veggies for a simple dinner, or cut them into bite-sized pieces for game day—same recipe, zero extra effort.
- Leftovers That Don’t Suck: I make a double batch on Sundays because reheating these is a dream. Toss them in the air fryer for 3 minutes, and they’re crispy again—no soggy afterthoughts. Plus, the chicken stays juicy, so you’re not left with dry, sad leftovers. Win.
Step-by-step instructions for baked teriyaki chicken tenders
Here's how to get those irresistibly crispy, sticky-sweet tenders every time.
👨🍳 Step 1: Prep the Chicken and Breading Station
Slice the 1.5 lb boneless, skinless chicken breast into 1-inch thick strips—this thickness ensures perfect doneness without drying out. Pat them completely dry with paper towels (moisture is the enemy of crispy breading).
In a shallow bowl, whisk together the 2 whole large eggs until smooth. In another bowl, combine the 1.5 cups Japanese panko breadcrumbs, 0.25 cup extra-fine cornstarch, 1.5 tsp Diamond Crystal kosher salt, and 0.5 tsp ground black pepper. The cornstarch gives that extra crunch we're after.
🍳 Step 2: Bread the Chicken for Maximum Crunch
Dip each chicken strip into the beaten eggs, letting excess drip off, then press firmly into the breadcrumb mixture, coating all sides completely. I press down gently with my fingers—this ensures the crumbs stick and creates that satisfying crunch. Transfer to a plate and let them rest for 5 minutes while you preheat the oven.
Preheat your oven to 400°F and line a baking sheet with parchment paper. Lightly brush the sheet with 2 tbsp vegetable oil—this prevents sticking and helps the breading get extra crispy. Arrange the breaded tenders in a single layer, leaving 1 inch between each piece for even browning.
🔥 Step 3: Bake Until Golden and Crispy
Bake for 18-20 minutes until the edges are deep golden brown and the internal temperature reaches 165°F (use an instant-read thermometer). Don't peek! Every time you open the oven, you risk steaming the breading instead of crisping it.
Here's the thing—I like to give the baking sheet a little shake every 5 minutes during the bake. This helps the tenders cook evenly and prevents them from sticking to the parchment. You'll know they're done when they're crispy on the outside and juicy on the inside—no gray areas allowed.
🥘 Step 4: Make the Sticky-Sweet Teriyaki Glaze
While the chicken bakes, whisk together 0.5 cup soy sauce, 0.33 cup honey, 2 tbsp finely grated fresh ginger, 4 minced garlic cloves, 1 tbsp rice vinegar, 1 tbsp toasted sesame oil, and 1 tbsp cornstarch in a small saucepan. Bring to a simmer over medium heat, stirring constantly for 3-4 minutes until it thickens to a glossy, coatable consistency.
The glaze should coat the back of a spoon and leave a slight trail when you run your finger through it. If it's too thick, add 1 tsp water at a time until it reaches that perfect balance between sticky and pourable. Taste and adjust seasoning—you might want to add a pinch more salt or a splash of vinegar for brightness.
🍽️ Step 5: Glaze and Serve with Confidence
Remove the chicken from the oven and transfer to a serving platter. Immediately pour the teriyaki glaze over the top, letting it pool in the bottom of the platter. Let the tenders sit for 2 minutes—this gives the glaze time to soak into the breading and create that irresistible sticky-sweet exterior.
Serve warm with your favorite dipping sauce or extra glaze on the side. Each bite should deliver crispy panko, juicy chicken, and that perfect balance of sweet, salty, and umami flavors. The tenders should hold their shape but still be tender enough to pull apart easily—no tough or dry chicken here!
Pro Tips For Making Baked Teriyaki Chicken Tenders
- Pound Chicken Evenly: I learned this the hard way—uneven thickness means some pieces dry out while others stay raw. Use a meat mallet or rolling pin to tap each breast to exactly ½-inch thickness. No guessing, just consistent pressure until every tender is the same size.
- Chill the Breading Mix: Cold panko sticks better to wet chicken than room-temperature crumbs. Pop your egg wash and panko mix in the fridge for 15 minutes before dredging. The cold egg sets faster, and the crust stays put—no flaking off during baking.
- Skip the Overcrowding: I used to bake all tenders at once, and they’d steam instead of crisp. Arrange them in a single layer on the tray with at least 1 inch between each. If needed, bake in two batches—crispy crusts aren’t worth the rush.
- Brush Twice with Teriyaki: One coat of sauce makes the chicken sticky and soggy. After the first bake, let the tenders rest 5 minutes, then brush them again with extra sauce. The second layer caramelizes better and gives that glossy, restaurant-worthy finish.
Make-ahead tips for this baked teriyaki chicken tenders
Marinade Prep Ahead
Make the teriyaki marinade up to 3 days in advance and store it in an airtight container in the fridge. The flavors deepen over time, especially the ginger and garlic, which become more aromatic when chilled.
I like to double the recipe and freeze half in ice cube trays—just thaw and use as needed. 🧄
Breaded Chicken Prep
Bread the chicken tenders up to 24 hours ahead and refrigerate them on a wire rack in an airtight container. This allows the breading to set slightly, making it easier to handle and ensuring extra crispiness when baking.
Just bake straight from the fridge at 400°F for 22-24 minutes—no thawing needed! This is a game-changer for busy weeknights.
Glaze Storage Tips
The teriyaki glaze keeps well in the fridge for 1 week in an airtight container. For longer storage, freeze it in 1-tablespoon portions in ice cube trays. When you're ready to use it, simply thaw and reheat in a small saucepan over low heat until warm.
I often make extra glaze to use as a dipping sauce—it's perfect for meal prep lunches.
Freezer-Friendly Method
For ultimate convenience, freeze the fully breaded (but unbaked) tenders on a parchment-lined tray for 1 hour, then transfer to a freezer bag. When ready to cook, bake straight from frozen at 400°F for 25-28 minutes, adding 2-3 extra minutes to ensure they're fully cooked.
The breading stays crispy, and you'll save time on prep days.
Reheating Perfection
Reheat leftover tenders in a 350°F oven for 5-7 minutes to restore that crispy texture. Avoid microwaving—they'll turn soggy. For extra crunch, broil for 1-2 minutes at the end, watching closely to prevent burning.
The glaze reheats beautifully too, so drizzle fresh glaze over the top before serving for that restaurant-quality finish. ✨
Nutrition facts
Frequently asked questions
Can I use chicken thighs instead of breasts for this recipe?
Chicken thighs work beautifully and stay juicier due to their higher fat content. Adjust baking time to 22-25 minutes at 400°F—thighs need a few extra minutes to reach 165°F internally. For best results, pat them very dry and use the same breading technique to maintain crispiness.
How do I keep the breading extra crispy?
The secret is in the prep! Let breaded tenders rest for 5 minutes before baking to help the coating adhere. Use Japanese panko (it's lighter than regular breadcrumbs) and add cornstarch to the breading mix. Bake on the middle rack for even heat circulation, and avoid overcrowding the pan.
Can I make this recipe gluten-free?
Yes, but with adjustments. Replace panko with gluten-free breadcrumbs or crushed gluten-free crackers mixed with cornstarch for crispiness. Use tamari instead of soy sauce in the glaze. Note that gluten-free breading may not be as crispy—consider adding an extra 1 tbsp cornstarch to compensate.
What's the best way to reheat these tenders?
Oven reheating is key! Place tenders on a baking sheet and heat at 350°F for 5-7 minutes to restore crispiness. For extra crunch, broil for 1-2 minutes at the end. Microwaving makes them soggy—never use it for this recipe.
Can I use store-bought teriyaki sauce instead of making my own?
You can, but homemade makes a difference! Store-bought sauces often lack depth. If using one, choose a low-sodium option and add 1 tbsp honey and 1 tsp grated ginger to enhance flavor. For best results, simmer it with 1 tbsp cornstarch to thicken properly.