
Main Courses
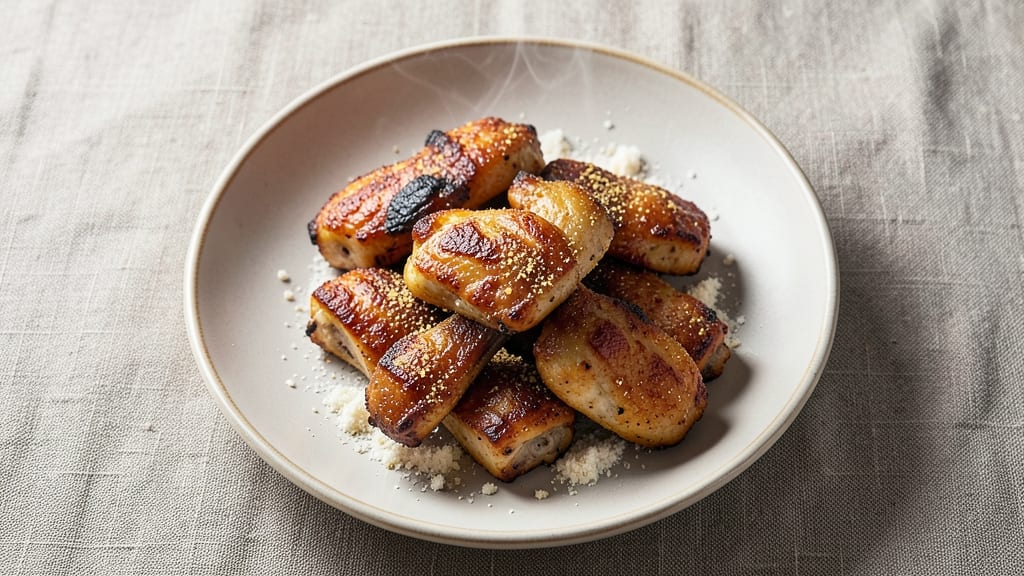
Transforming chicken necks into crispy-skinned, flavor-packed bites unlocks a culinary secret most home cooks overlook. These versatile cuts deliver rich, gelatinous broths when slow-cooked and irresistible crispy textures when properly fried—making them a professional chef’s secret weapon for both weeknight dinners and special occasions.
The key lies in proper preparation and cooking technique, which turns what many consider scraps into a dish that rivals restaurant-quality results.
What makes this recipe stand out is its dual-purpose approach: you can achieve crispy, golden-skinned chicken necks through a simple frying method, or transform them into a deeply flavorful stew by simmering them low and slow.
The natural collagen in chicken necks releases during cooking, creating a broth so rich it elevates any meal. Whether you're making a hearty soup or a crispy appetizer, this method ensures every bite delivers maximum flavor and texture.
The process begins with thorough drying and seasoning of the chicken necks, followed by either a quick fry for crispy skin or a slow simmer for tender, melt-in-your-mouth meat. For the crispy version, the secret is maintaining a steady temperature—too hot, and they’ll burn; too cool, and they’ll stay soggy.
For the broth version, patience is key: letting the necks simmer for hours transforms tough connective tissue into a luxurious, velvety base that’s perfect for soups, stews, or even braised dishes.
This recipe isn’t just about the main event—it’s about maximizing every part of the chicken. Use the crispy fried necks as an appetizer with dipping sauces, or shred the slow-cooked version into tacos, salads, or sandwiches.
The possibilities are endless, and the results are always impressive. Ready to turn chicken necks into a showstopper? Let’s get started with the full method.
Ingredients for chicken necks
Transform scraps into restaurant-quality bites with these 15 essential ingredients for crispy chicken necks and rich broth.
| Ingredient | Amount | Notes |
|---|---|---|
| Chicken Necks 🍗 | 1 ½ lb | Fresh, skin-on preferred |
| All-Purpose Flour 🌾 | ½ cup | For dredging crispy version |
| Cornstarch 🌾 | ¼ cup | For extra crispiness |
| Salt 🧂 | 1 ½ tbsp | Kosher or sea salt |
| Black Pepper 🌶️ | ½ tbsp | Freshly ground preferred |
| Garlic Powder 🧄 | 1 tbsp | For seasoning |
| Onion Powder 🧅 | 1 tbsp | For seasoning |
| Paprika 🌶️ | 1 tsp | Smoked or sweet |
| Vegetable Oil 🫒 | 2 cups | For frying crispy version |
| Carrots 🥕 | ½ lb | Whole, peeled, chopped |
| Celery Stalks 🥬 | 3 whole | Chopped for broth |
| Yellow Onion 🧅 | 1 whole | Chopped for broth |
| Bay Leaves 🌿 | 2 whole | For broth flavor |
| Fresh Thyme 🌿 | 2 sprigs | Or 1 tbsp dried thyme |
| Water 💧 | 4 cups | For broth base |
The chicken necks are the star, so source them from a reputable butcher—they should be plump, with minimal odor. Costco and local farms often carry them at better prices than grocery stores. For the crispy version, pat them completely dry before seasoning—any moisture will prevent crispiness. The necks should be skin-on for maximum flavor and texture. If you can't find fresh, frozen works too, just thaw overnight in the fridge. The difference between good and great broth comes down to the vegetables: organic carrots and celery have more flavor, but regular will do in a pinch.
No cornstarch? Extra flour or rice flour works in a bind for crispiness. Short on thyme? Dried thyme at half the amount or a bay leaf will add depth. The broth vegetables can be swapped—leeks or fennel add complexity. For the crispy version, pepitas or crushed nuts mixed into the flour coating add crunch. If you're making both crispy and broth versions, use half the chicken necks for each method. The oil for frying should have a high smoke point—vegetable or canola oil are ideal.
Store leftover crispy chicken necks in an airtight container for 3-4 days—they reheat beautifully. The broth freezes exceptionally well, so double the batch and portion into ice cube trays for easy use. It keeps 3 months frozen. For the crispy version, fry just before serving to maintain texture. The broth can be reduced on the stove for a more concentrated flavor, or diluted with water for soups. Both methods yield leftovers that taste even better the next day.
Why You'll Love This Recipe
- Fewer Ingredients, Bigger Payoff: I swear by this recipe because it’s that simple—just flour, cornstarch, salt, and pepper. No fancy marinades or last-minute shopping runs. Honestly, I’ve made it after forgetting every other ingredient in my pantry, and it still delivers.
- Crispy Without the Hassle: That perfect crunch comes from the cornstarch blend, and it’s foolproof—no double-dredging or frying tricks. Toss the necks in the mix, pan-sear until golden, and boom. The outside shatters, but inside stays juicy. (Yes, even on a Tuesday night.)
- Leftovers That Don’t Suck: I make a double batch on Sundays because reheating these is chef’s kiss—crispy again in the oven or air fryer. My kids grab them straight from the fridge for school lunches, and my partner microwaves them cold for a snack. Zero complaints.
- Budget Magic for Big Batches: Chicken necks are the unsung hero of affordable protein, and this recipe stretches them far. A single bag feeds my family of four for two meals, and the cost? A fraction of what I’d spend on thighs or breasts. (Between us, this is how I stretch my grocery budget without sacrificing flavor.)
Step-by-step instructions for crispy chicken necks with rich broth
Here's the method to achieve double-duty chicken necks—crispy-skinned perfection and flavorful broth.
Prepare the Chicken Necks for Crispy Skin
Pat the 1.5 lb chicken necks completely dry with paper towels, removing any excess moisture from the skin. This step is critical for achieving crispiness—wet skin won't brown properly. Place the chicken necks in a bowl and season generously with 1.5 tbsp salt, 0.5 tbsp black pepper, 1 tbsp garlic powder, 1 tbsp onion powder, and 1 tsp paprika. Toss to ensure an even coating on all sides.
Next, create a dredging station by mixing 0.5 cup all-purpose flour and 0.25 cup cornstarch in a shallow dish. The cornstarch helps create an extra-crispy texture. Working in batches, lightly coat each chicken neck in the flour mixture, shaking off any excess. Let them rest on a wire rack for 10 minutes—this allows the coating to adhere firmly and prevents clumping when frying.
Fry to Golden Crispiness
Heat 2 cups vegetable oil in a deep skillet or Dutch oven over medium-high heat until it reaches 350°F. Use a thermometer to monitor the temperature—this precision ensures even cooking. Once the oil is hot, carefully add the chicken necks in a single layer, being cautious of splattering. Cook for 8-10 minutes, turning occasionally, until the skin is deep golden brown and crispy.
Remove the chicken necks and place them on a paper towel-lined plate to drain excess oil. The skin should be firm to the touch and hold its shape when pressed gently. If the oil smokes excessively, reduce the heat slightly—this indicates it's too hot and will burn the chicken instead of frying it properly.
Simmer the Broth for Depth of Flavor
In the same skillet (no need to clean it—the browned bits add flavor), add 0.5 lb chopped carrots, 3 chopped celery stalks, 1 chopped yellow onion, 2 whole bay leaves, and 2 sprigs fresh thyme. Sauté over medium heat for 3-4 minutes until the vegetables soften slightly and release their aromatics.
Pour in 4 cups water and bring to a boil. Once boiling, reduce the heat to low and add the fried chicken necks back to the pot. Cover and simmer for 1.5 hours, skimming any foam that rises to the surface. This simmering process infuses the broth with rich, savory notes while keeping the chicken necks tender. The broth should reduce slightly, becoming more concentrated and flavorful.
Finish and Serve
After simmering, remove the chicken necks from the broth and let them rest for 5 minutes before serving. The broth can be strained and used immediately for soups, stews, or rice dishes, or stored in the refrigerator for up to 5 days or frozen for 3 months. The chicken necks themselves can be shredded for tacos, added to salads, or enjoyed as-is with crusty bread.
The result is a crispy-skinned chicken neck that delivers both texture and flavor, paired with a deeply aromatic broth that forms the backbone of countless dishes. This dual-purpose method ensures no part of the chicken goes to waste.
Pro Tips For Making Chicken Necks
- Trim the Fat First: Chicken necks have a thick layer of fat that can make your fried or baked dish greasy if ignored. Use kitchen shears to snip through the skin and fat just above the neck joint—this exposes more surface area for browning and keeps your final dish from turning into a soggy mess. (Yes, it’s a little messy, but worth it.)
- Double-Dust, Not Single: Skip the lazy single coat of flour—this recipe needs a real crust. Toss the necks in flour, shake off excess, then dip again in a 50/50 flour-cornstarch mix. The cornstarch locks in crispiness while the flour adds structure. I learned this the hard way after my first batch turned out mealy.
- Salt the Water Hard: If you’re poaching or blanching, don’t skimp on the salt—aim for 2 tablespoons per 4 quarts of water. The necks absorb flavor like sponges, and bland water means bland results. (Pro move: Add a bay leaf too—it disappears but makes a difference.)
- Fry in Batches, Not Piles: Crowding the pan drops the temperature and steams the necks instead of frying them. Work in small batches—3-4 necks max—so the oil stays hot enough to render fat and build that golden crust. I used to rush this and ended up with greasy, unevenly cooked necks every time.
Serving suggestions for this recipe
Crispy Chicken Bites
Serve the golden fried chicken necks as an appetizer with a spicy honey mustard dip—mix 3 tbsp Dijon mustard, 2 tbsp honey, 1 tbsp sriracha, and 1 tbsp soy sauce.
Arrange them on a platter with toothpick flags for an elegant touch. I love pairing them with crispy jicama sticks or pickled radishes for crunch and acidity. 🍯
Broth-Based Bowls
Use the rich broth as a base for pho-style bowls—ladle it over steamed rice, add sliced shitake mushrooms, bean sprouts, and lime wedges. Top with fried egg and cilantro for a Vietnamese-inspired dish.
For a heartier option, shred the simmered chicken necks and mix with coconut milk, lemongrass, and red curry paste. 🍜
Taco & Sandwich Filling
Shred the slow-cooked chicken necks and mix with taco seasoning (or 1 tbsp chili powder, ½ tsp cumin, ½ tsp garlic powder) for crispy taco meat.
Pile into corn tortillas with avocado crema and pickled onions. For sandwiches, layer on ciabatta rolls with caramelized onions and blue cheese crumbles. 🌮
Garnish & Presentation
Brighten any dish with fresh cilantro, thinly sliced scallions, or lime zest. For the crispy version, sprinkle with flaky sea salt and smoked paprika right before serving. I also drizzle chili oil over bowls for a smoky kick. Use black sesame seeds for an Asian-inspired touch. ✨
Leftovers Reinvented
Turn leftover broth into ramen or risotto—simmer with shirataki noodles and soft-boiled eggs for a quick meal. Crispy necks? Toss them into fried rice or pasta dishes for extra protein. Store broth in ice cube trays for easy portioning in future recipes. 💡
Dipping Sauces
For extra flavor, offer three dipping options:
- Garlic aioli (mix ½ cup mayo, 1 minced garlic clove, 1 tsp lemon juice);
- Soy-ginger (reduce ¼ cup soy sauce with 1 tbsp grated ginger);
- Mango habanero (blend ½ cup mango purée with 1 habanero pepper). 🍶
Nutrition facts
Frequently asked questions
Why do chicken necks make such a rich broth?
Chicken necks are packed with collagen and connective tissue, which breaks down during slow cooking to create a velvety, gelatin-rich broth. This natural process transforms tough fibers into luxurious texture—perfect for soups, stews, or braised dishes. The longer you simmer them, the deeper the flavor becomes!
Can I use frozen chicken necks instead of fresh?
Yes! Thaw frozen chicken necks overnight in the refrigerator before using. Never thaw at room temperature, as this promotes bacterial growth. Pat them completely dry before seasoning to ensure crispiness if frying. The texture and flavor will be just as good as fresh.
How do I store leftover crispy chicken necks?
Store them in an airtight container in the fridge for 3-4 days or freeze for up to 1 month. Reheat in a 350°F oven for 10-12 minutes to restore crispiness. Avoid microwaving—they’ll turn soggy! For best results, reheat from frozen.
What’s the secret to extra-crispy chicken necks?
Three key steps: dry thoroughly, use a mix of flour and cornstarch (cornstarch adds crunch), and maintain 350°F oil temperature. Let them rest on a rack for 10 minutes before frying to prevent clumping. Patience at each stage makes all the difference!
Can I make this recipe without cornstarch?
Swap the cornstarch for extra flour or rice flour—just use the same 0.25 cup amount. The texture will be slightly less crispy but still delicious. For even better results, add ½ tsp baking powder to the flour mix to help with crispiness.