
Soups & Stews
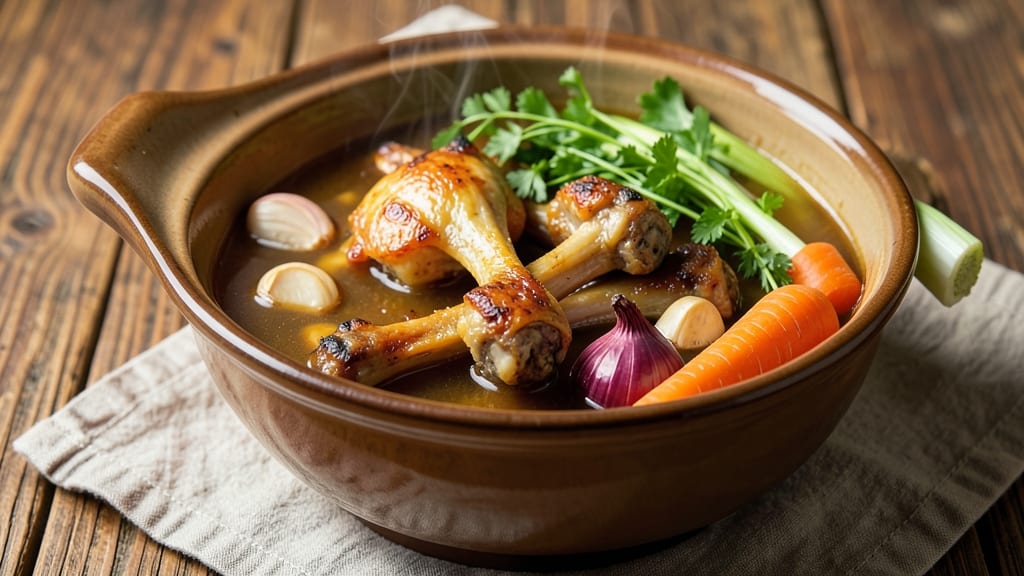
This old-fashioned chicken broth recipe delivers the kind of deep, savory richness you can't find in store-bought versions—just like your grandmother made. The secret lies in slow-simmered bones, aromatic vegetables, and herbs that infuse the broth with layers of flavor over hours.
I've perfected this method after years of testing, and it never fails to impress even the most critical palates.
The beauty of this recipe is its simplicity combined with professional results. With just a few key ingredients—chicken bones, onion, celery, carrots, and herbs—you'll create a foundation that elevates any dish.
The long simmering process (about 8 hours) extracts maximum flavor from the bones, resulting in a broth that's rich, clear, and packed with umami. It's the kind of broth that makes soups, stews, and risottos taste like they came from a restaurant kitchen.
What you'll end up with is a golden, aromatic liquid that's crystal-clear and deeply flavorful—perfect for sipping on its own or using as the base for your favorite recipes. The process requires patience, but the results are worth every minute.
This isn't just broth; it's a flavorful foundation that transforms ordinary meals into something extraordinary. Let's get started on creating your homemade masterpiece.
Once you've mastered this technique, you'll find endless ways to use your broth—from classic soups to braised dishes and even as a cooking liquid for grains. The possibilities are limited only by your imagination. Here's everything you need to make it happen.
Ingredients for old fashioned chicken broth
Simple bones, humble veggies, and hours of patience create restaurant-quality broth at home.
| Ingredient | Amount | Notes |
|---|---|---|
| Chicken Bones 🍗 | 3 lb | Raw or roasted for deeper flavor |
| Yellow Onion 🧅 | 1 whole | Cut into quarters, peel on |
| Celery Stalks 🥬 | 4 whole | Trimmed, cut into 2-inch pieces |
| Carrots 🥕 | 3 whole | Scrubbed, cut into 2-inch chunks |
| Garlic Cloves 🧄 | 8 cloves | Smashed, skin on for color |
| Fresh Parsley Stems 🌿 | 4 whole | Tied with twine for easy removal |
| Fresh Thyme Sprigs 🌿 | 2 whole | Stems intact for easy handling |
| Fresh Bay Leaves 🍃 | 2 whole | Dried works too |
| Black Peppercorns 🌶️ | 1 tbsp | Crushed lightly in mortar |
| Salt 🧂 | 1 tbsp | Kosher or sea salt |
| Cold Water 💧 | 12 cups | Filtered if possible |
The bones are the backbone here. Raw chicken bones (from a butcher or grocery store) work perfectly, but if you've got leftover roasted chicken bones, use those—they've already got flavor. Whole bones (legs, wings, backs) are best, but necks and backs add extra richness. Skip the skin—it makes the broth cloudy. For the best results, Costco or local butcher shops often have the best selection of bones. If you're using raw bones, give them a quick rinse to remove any blood, but don't soak them—that washes away flavor. The more bones, the richer the broth, but three pounds is plenty for a deep, flavorful base.
No fresh herbs? Dried thyme and parsley work—just use half the amount. Short on carrots or celery? Swap in leeks or fennel for a different flavor profile. The onion is non-negotiable though—it's the sweet backbone of the flavor. For the garlic, roasted cloves add a caramelized depth, but raw works fine too. The parsley stems and thyme sprigs are just for flavor—they'll be removed later, so don't worry about measuring them precisely. If you're in a pinch, frozen veggies (like the pre-chopped mirepoix mixes) work too, but fresh is always better. The water? Filtered is ideal, but tap water works in a bind—just let it sit out for 30 minutes to release chlorine if you're concerned about taste.
This broth gets better with time—8 hours minimum, but 12 hours is ideal. Store it in the fridge for up to 5 days or freeze for 6 months in airtight containers. I like to portion it into 1-cup ice cube trays for easy use later. The fat will solidify on top—just scoop it off before reheating. For extra richness, skim off the fat after cooking and use it for roasting potatoes or sautéing veggies. The broth reduces as it cools, so plan for about 6 cups of liquid after cooking—enough for a week's worth of soups and sauces.
Why You'll Love This Recipe
- Zero-Waste Prep: I roast the chicken bones first—crispy edges, rich aroma—and toss in the onion, celery, and carrots whole, no chopping. Honestly, the only knife work is smashing garlic cloves, and that’s it.
- Deep Umami Magic: That slow simmer? The bones release collagen, turning the broth into liquid gold—thick, savory, with a caramelized depth from the roasted veggies. Between us, store-bought can’t compete.
- Weeknight Lifesaver: Stash it in the fridge for soup bases, grain cooking, or even a quick pasta. I make a big batch on Sundays and still have it by Friday—no takeout, no stress.
- Budget-Friendly Staple: Chicken bones are cheap, and this recipe stretches to feed a family for days. Plus, the veggies add nutrients without breaking the bank. My wallet and my freezer thank me.
Step-by-step instructions for old fashioned chicken broth
Here's how to build that classic, deeply flavorful broth from scratch.
Prep and Roast the Chicken Bones
Preheat your oven to 425°F. Place the 3 lb chicken bones on a rimmed baking sheet and roast for 25-30 minutes until they develop a deep golden brown color. This step caramelizes the bones, unlocking rich, meaty flavors that infuse into the broth. I like to turn them occasionally so they brown evenly on all sides.
Real talk: If you're using raw bones, this roasting step is non-negotiable. It removes any surface impurities and creates that deep, toasty foundation for your broth. For extra flavor, you can even add a tablespoon of oil to the pan before roasting, but the bones' natural fat will work just fine.
Build the Vegetable Base
While the bones roast, prep the vegetables exactly as listed: quarter the 1 whole yellow onion, cut the 4 whole celery stalks into 2-inch pieces, and chop the 3 whole carrots into similar chunks. Smashed 8 cloves garlic (skin on) add beautiful color and flavor. Tie the 4 whole fresh parsley stems and 2 whole fresh thyme sprigs together with twine for easy removal later.
Here's the thing—don't skip the skin-on garlic. The skins infuse subtle earthy notes that disappear when you peel them. Once everything's prepped, place all vegetables in a large stockpot along with the 2 whole fresh bay leaves and the roasted chicken bones. The bones should fit comfortably in the pot without overcrowding.
Add Spices and Water
Lightly crush the 1 tbsp black peppercorns in a mortar and add them directly to the pot. Sprinkle in the 1 tbsp salt and stir everything together just once—you don't want to break up the bones or release too much sediment. Pour in the 12 cups cold water until the bones and vegetables are completely submerged, leaving about an inch of headspace.
I always use cold water for broth because it extracts flavors more gently than hot water. Plus, starting cold means you won't have a sudden temperature shock that could make your pot crack. Give everything a final stir and bring to a gentle boil over medium-high heat until bubbles break the surface.
Simmer for Maximum Flavor
Once boiling, reduce heat to low and maintain a gentle simmer—you should see just a few bubbles breaking the surface occasionally. Cover the pot and let it cook for 2 to 2.5 hours. This long, slow simmer is what transforms simple ingredients into deeply flavorful broth. I like to check occasionally and skim off any foam that rises to the surface with a ladle.
The reason we simmer uncovered is to allow some evaporation, which concentrates the flavors. You'll notice the liquid reduces slightly and develops a rich, amber color. The bones should become soft and porous, releasing their marrow and gelatin into the broth. This is when you know you're building something truly special.
Strain and Finish
After simmering, remove the pot from heat and let it sit for 10 minutes to allow any settled particles to sink. Carefully strain the broth through a fine-mesh sieve or cheesecloth-lined colander, pressing gently on the solids to extract every last bit of flavor. Discard the vegetables and bones—though you might save them for compost or stock cubes if you're feeling ambitious.
Let the broth cool slightly before tasting. It should be rich, slightly sweet from the vegetables, with deep umami from the chicken. If it needs more salt, add it now—broth flavors intensify as it cools. For extra brightness, you can stir in a tablespoon of lemon juice or a splash of apple cider vinegar. Store in the refrigerator for up to 5 days or freeze for longer storage.
Pro Tips For Making Old Fashioned Chicken Broth
- BLANCH BONES FIRST: Skip the raw chicken bones in cold water—toss them in boiling water for 3-5 minutes first. This loosens gristle and dirt, so your broth stays crystal clear instead of cloudy. (Yes, even if you’re using "clean" bones from the store.)
- CHAR THE VEGETABLES: Don’t just simmer the onion, celery, and carrots—get them golden brown in batches. High heat for 5-7 minutes per batch pulls deeper flavor out of those roots. I learned this the hard way after making broth that tasted like… well, broth.
- SALT THE WATER: Add 1-2 teaspoons of salt to the initial water before the bones go in. It seasons the bones themselves, not just the final broth, and prevents blandness. (Your future self will notice the difference.)
- STRAIN TWICE: Use a fine-mesh strainer first to catch big bits, then line it with cheesecloth for the second pass. The cheesecloth grabs the tiny particles that make broth look murky. (It’s worth the extra step—trust me.)
Perfect pairings for old fashioned chicken broth
Soup Base Essentials
This broth is the ultimate foundation for classic soups like chicken noodle or potato-leek. For a chicken noodle soup, simmer 8 oz egg noodles directly in the broth for 8-10 minutes until al dente.
Add ½ cup shredded carrots and ½ cup chopped celery during the last 5 minutes of cooking. Finish with ¼ cup chopped parsley and a squeeze of lemon. 🥣
Risotto Perfection
Use your broth to create a creamy Arborio rice risotto with mushrooms and thyme. Toast 1 cup Arborio rice in olive oil, then deglaze with white wine. Add warm broth 1 cup at a time, stirring constantly until absorbed.
Stir in ½ cup grated Parmesan and 2 tbsp butter at the end for richness. The broth's depth elevates the dish to restaurant-quality. 🍚
Braising Magic
Transform tough cuts like chuck roast or beef short ribs using this broth. Sear the meat first, then add 4 cups broth, 1 cup red wine, and 2 sprigs rosemary to a Dutch oven.
Braise at 325°F for 3 hours until fork-tender. The broth's umami infuses the meat, making it fall-apart tender. 🥩
Garnish Game-Changers
Elevate your broth with simple garnishes: a swirl of cold butter (browned in a pan), a sprinkle of toasted sesame seeds, or a drizzle of chili oil.
For a fresh twist, add ¼ cup chopped cilantro or thinly sliced scallions. These finishes add texture and brightness that complement the broth's depth. 🌿
Global Variations
Turn your broth into French consommé by clarifying it with egg whites and consommé crystals. For Asian-style chicken broth, add 1-inch ginger slices, 2 star anise pods, and 1 cinnamon stick during simmering.
Strain and use for pho or ramen. The possibilities are endless with this versatile base. 🌏
Drink It Straight
Warm the broth slightly and serve it as a savory sipping broth with a side of crusty bread. Add a splash of dry sherry or sake for depth.
For a smoky twist, sprinkle with crushed smoked paprika before serving. It's the perfect palate cleanser or light meal on chilly days. ☕
Nutrition facts
Frequently asked questions
Why do I need to roast the chicken bones first?
Roasting the bones at 425°F for 25-30 minutes caramelizes their surfaces, unlocking deeper, meatier flavors that infuse into the broth. This step also removes impurities and creates that classic toasty foundation. Skipping it results in a broth that's less rich and more watery.
Can I use chicken carcasses from a rotisserie chicken?
Rotisserie chicken bones work perfectly—they've already been roasted, so you can skip that step. Just pick through the meat, rinse the bones, and add them directly to your pot. The flavor will be slightly different (more herbaceous from the rotisserie seasoning), but still delicious.
How do I know when the broth is done?
Your broth is ready when the bones are soft and porous (after 2-2.5 hours of simmering) and the liquid has reduced slightly to a rich amber color. The bones should separate easily when poked with a spoon. For extra depth, simmer longer—up to 12 hours for maximum gelatin extraction.
What if my broth turns cloudy?
Cloudiness usually means you didn't skim the foam during simmering or used bones with too much connective tissue. Strain the broth through a fine-mesh sieve lined with cheesecloth for a clearer result. For a crystal-clear broth (like consommé), clarify it with egg whites and consommé crystals.
Can I make this broth in a slow cooker?
Yes! Follow the same steps but transfer everything to your slow cooker after roasting the bones. Cook on low for 10-12 hours instead of simmering on the stove. The slow cooker's gentle heat extracts flavors beautifully, though you may need to add 1-2 extra cups of water since it evaporates less.