
Snacks
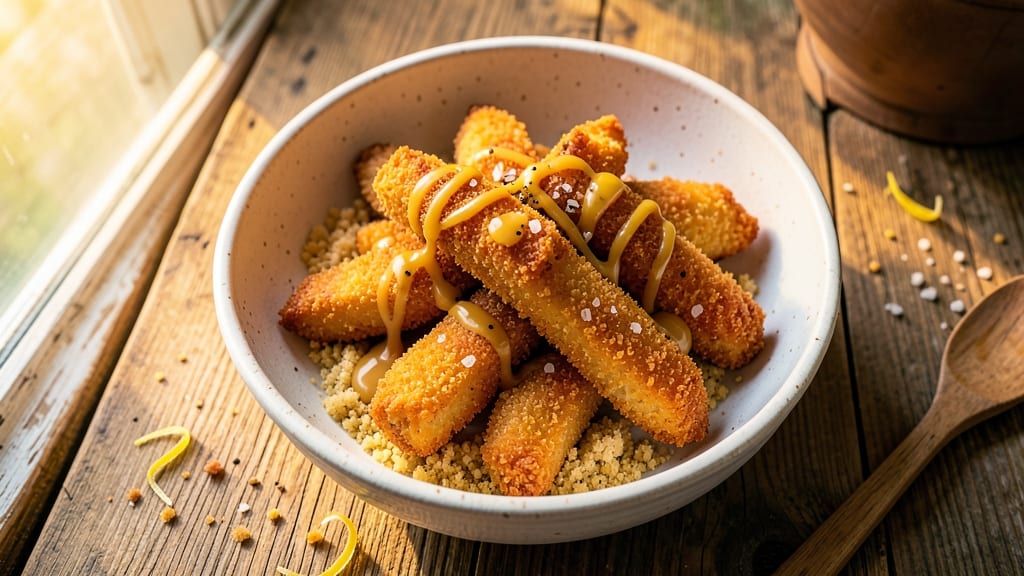
This air fried chicken finger recipe delivers restaurant-quality crispiness with a juicy core—all in just 15 minutes. The secret lies in a double-dredge technique that creates a golden, shatteringly crisp crust while keeping the meat tender inside.
I've perfected this method over countless batches, ensuring every finger stays perfectly shaped and never soggy. What sets these apart is the air fryer's ability to circulate hot air evenly, creating that ideal texture without deep-frying mess.
The process is straightforward: marinate the chicken (optional but recommended), coat in seasoned flour, then bread with panko for extra crunch. The result? Fingers that hold their shape beautifully and maintain that satisfying snap.
By the time they emerge from the air fryer, you'll have golden-brown fingers with a crispy exterior and moist interior, ready to be served with your favorite dipping sauces. The air fryer's precision cooking ensures consistent results every time—no more unevenly cooked batches or greasy fingers.
Serve with honey mustard, ranch, or spicy mayo for the ultimate snack experience. This recipe is perfect for game day, kids' lunches, or a quick protein-packed snack. Let's get cooking!
Ingredients for air fried chicken finger
Restaurant-quality crispiness and juicy cores start with these carefully chosen ingredients.
| Ingredient | Amount | Notes |
|---|---|---|
| Boneless, Skinless Chicken Breast 🍗 | 1 ½ lb | Cut into 1-inch strips, pounded even thickness |
| All-Purpose Flour 🌾 | 1 cup | For dredging, sifted for even coating |
| Japanese Panko Breadcrumbs 🍞 | 1 ½ cups | Light and crispy, not fine breadcrumbs |
| Large Eggs 🥚 | 2 whole | Beaten, room temperature for even coating |
| Diamond Crystal Kosher Salt 🧂 | 1 ½ tsp | For seasoning flour mixture |
| Ground Black Pepper 🌶️ | ½ tsp | Freshly cracked for best flavor |
| Garlic Powder 🧄 | 1 tsp | For seasoned flour coating |
| Onion Powder 🧅 | 1 tsp | For seasoned flour coating |
| Paprika 🌶️ | ½ tsp | Smoked variety for extra depth |
| Butter, Unsalted 🧈 | 2 tbsp | Melted for brushing between dredges |
| Vegetable Oil Spray 🫒 | 1 tbsp | For air fryer basket coating |
| Cornstarch 🌾 | 1 tbsp | Optional for extra crispiness |
The chicken breast is critical here—look for evenly sized pieces at the butcher counter or pre-cut packages from Trader Joe's. Pounding to even thickness ensures perfect cooking. For the flour, Bob's Red Mill all-purpose works best—it's finely milled for smooth dredging. The panko should be Japanese-style (like Kikkoman) for that signature shatteringly crisp texture. If you can't find smoked paprika, regular paprika plus a pinch of cayenne works in a pinch, though the flavor profile won't be identical. Always use Diamond Crystal kosher salt—it's finer and dissolves better than table salt, giving you better flavor distribution.
No panko on hand? Crushed cornflakes or buttery cracker crumbs create a similar texture, though they won't be as light. Running out of eggs? Greek yogurt or unsweetened applesauce work as binders, though the coating may be slightly less crisp. For the butter, European-style unsalted butter like Plugrá has higher fat content, which helps create that golden crust. The cornstarch is optional but worth the extra minute—it adds a delicate crunch that regular flour can't match. When prepping, keep the chicken and breading mixtures in separate bowls to avoid soggy fingers. And trust me on this: room temperature ingredients make all the difference in texture.
Prepped chicken strips keep 2 days in the fridge, sealed in an airtight container with parchment between layers. The panko stays fresh 3 months in a cool, dark place, but it's better to use it up sooner. For the ultimate crisp, pat dry the chicken thoroughly before dredging—moisture is the enemy of crispiness. These fingers reheat beautifully in the air fryer for 2-3 minutes at 375°F, making them perfect for quick snacks. Store leftovers in a single layer on a wire rack to maintain that crisp texture.
Why You'll Love This Recipe
- No-Fuss Breading: I swear by the flour-egg-panko combo—it’s foolproof. No fancy mixers or weird ratios; just dip, coat, and air-fry. The panko gives that perfect crunch without the mess of deep-frying.
- Crispy-Creamy Magic: That air fryer works wonders here. The outside gets gloriously crispy from the panko, while the inside stays juicy—no dry bites, no sad chicken fingers. Honestly, it’s the closest I’ve gotten to fast-food quality without the guilt.
- Game for Any Meal: Keep a batch in the fridge for quick lunches or toss them in a salad for dinner. My kids grab them straight from the air fryer as snacks, and they’re just as good reheated as fresh. (Yes, even on a Tuesday night.)
- Budget-Friendly Crunch: Chicken breast is cheap, and this recipe stretches it far. A single batch feeds four, and leftovers reheat beautifully. I’ll be real: it’s my go-to when I need something satisfying without breaking the bank.
Step-by-step instructions for crispy air-fried chicken fingers
Here's the professional method to achieve restaurant-quality texture every time.
Prepare the Chicken and Seasoned Flour Coating
Begin by cutting the 1.5 lb boneless, skinless chicken breast into 1-inch strips and pounding them to an even ¼-inch thickness using a meat mallet. This ensures even cooking and maximum crispiness. Place the strips on a plate and refrigerate while you prepare the coating.
In a shallow bowl, whisk together the 1 cup all-purpose flour, 1.5 tsp Diamond Crystal kosher salt, 0.5 tsp ground black pepper, 1 tsp garlic powder, 1 tsp onion powder, and 0.5 tsp paprika. Sift the mixture once to eliminate any lumps—this creates a light, even coating. The combination of spices adds depth while the salt enhances the natural flavor of the chicken.
Create the Egg and Panko Breading Stations
In a second shallow bowl, beat the 2 whole large eggs until just combined. The eggs should be smooth but slightly thickened—this helps them cling to the chicken strips. For extra crispiness, add the 1 tbsp cornstarch to the egg mixture and whisk until fully dissolved. This optional step creates a lighter, more delicate crust that still maintains structural integrity.
In a third bowl, combine the 1.5 cups Japanese panko breadcrumbs. The panko's airy, irregular structure is crucial—it creates a crispy exterior while allowing steam to escape, keeping the chicken juicy. Melt the 2 tbsp unsalted butter and brush it lightly over the panko, tossing to distribute evenly. This step adds richness and helps the coating adhere better during frying.
Bread the Chicken in Three Stages
Working in batches to avoid crowding, dip each chicken strip into the flour mixture, shaking off any excess. Then dip into the egg wash, allowing any excess to drip off. Finally, press the strips into the buttered panko, ensuring full coverage on all sides. The three-stage breading creates a layered crust that crisps perfectly in the air fryer.
Place the breaded strips on a wire rack set over a baking sheet. This allows air to circulate around each piece, preventing them from steaming instead of crisping. Let them rest for 5 minutes at room temperature—this helps the coating adhere more firmly and prevents crumbs from falling off during cooking.
Air Fry to Golden Perfection
Preheat the air fryer to 375°F for 3 minutes. While it heats, lightly spray the basket with 1 tbsp vegetable oil spray—this prevents sticking and enhances browning. Arrange the chicken strips in a single layer, leaving ½-inch space between each piece. Overcrowding steams the chicken instead of crisping it.
Cook for 12-14 minutes, flipping the strips once halfway through at the 6-minute mark. The chicken is done when the coating is deep golden brown and the internal temperature reaches 165°F at the thickest part. Watch closely after 10 minutes—air fryers vary in heat output, and you want to catch the moment before the coating turns too dark.
Rest and Serve Immediately
Transfer the cooked chicken fingers to a wire rack and let them rest for 3-5 minutes. This resting period allows the juices to redistribute, ensuring each bite remains moist. Serve with your favorite dipping sauce—whether it's classic ranch, honey mustard, or a spicy aioli—and enjoy immediately while the crust is at its crispest.
The result should be fingers with a shatteringly crisp exterior and a juicy, tender interior. The three-stage breading creates a textural contrast that makes each bite satisfying, while the air frying method delivers that coveted golden-brown finish without excessive oil.
Pro Tips For Making Air Fried Chicken Finger
- Prep Chicken Thin: Slice those chicken breasts paper-thin—about ¼-inch thick—before dredging. Thicker pieces stay chewy inside, and you’ll end up with uneven cooking. I learned this the hard way after biting into a rubbery center that ruined an otherwise perfect batch.
- Salt the Panko: Mix 1 teaspoon Diamond Crystal kosher salt into your panko before coating—it’s the non-negotiable step that makes the crust taste like it belongs there. Skipping this means your fingers will taste bland no matter how crispy they get.
- Double-Dredge Like a Pro: Dip chicken in egg, coat with flour, shake off excess, dip again in egg, then press into panko—hard—so it sticks. The extra flour first locks in moisture, and the double-dip guarantees a shatteringly crisp crust. (Yes, it’s messy, but worth it.)
- Cook in Batches: Air fry in single layers with no overlap, and space them out—crowding steams the breading instead of crisping it. Start at 375°F for 8 minutes, then bump to 400°F for the last 3-4 to get that golden finish. (Your air fryer will thank you too.)
Make-ahead tips for leftovers
Prep Ahead Strategy
Start by prepping the chicken strips and seasoned flour mixture 1 day ahead. Store the cut chicken in an airtight container with parchment between layers to prevent sticking. Keep the seasoned flour in a sealed baggie—it stays fresh for 5 days in the fridge.
I find this gives me a head start on busy days, and the chicken stays perfectly tender when refrigerated. 💪
Breading Assembly
Assemble your breading stations the morning of cooking. Whisk the eggs and melt the butter for the panko, then store everything in separate containers. The egg wash should be kept in a sealed container with plastic wrap pressed directly on the surface to prevent a skin from forming.
This keeps the coating crispy and ready to use. 🥚
Freezer-Friendly Method
For a true make-ahead solution, bread the chicken fingers completely and freeze them on a wire rack until solid. Transfer to a freezer bag with parchment between layers—this prevents sticking.
Cook straight from frozen at 375°F for 16-18 minutes, flipping once. The extra time accounts for the cold start, and you'll still get that perfect crisp. ❄️
Reheating Leftovers
Store cooked fingers in an airtight container with parchment between layers to maintain crispiness. Reheat in the air fryer at 375°F for 2-3 minutes, shaking the basket halfway.
For a stovetop option, use a skillet over medium heat for 1-2 minutes per side—just watch closely to avoid burning. 🔥
Sauce Prep
Make your favorite dipping sauces in advance and store them in small containers. Ranch and honey mustard keep for 5 days in the fridge, while homemade aioli lasts 3 days.
I like to portion sauces into small ramekins for easy serving—just grab and go when the fingers are ready. 🍯
Game Day Hack
For parties, bread all your fingers the night before and store them in the fridge. Set up your air fryer station the morning of—preheat while guests arrive, then cook in batches.
Keep cooked fingers warm in a 200°F oven on a wire rack (not a plate) to maintain crispiness. This keeps your hands free for hosting! 🎉
Nutrition facts
Frequently asked questions
Can I use chicken thighs instead of breasts for this recipe?
Yes, but you'll need to adjust the cooking time! Chicken thighs stay juicier longer, so cook them at 375°F for 14-16 minutes, flipping once at 7-8 minutes. The thicker cut may need an extra minute or two. For best results, pound them to ½-inch thickness to ensure even cooking.
Why are my air-fried chicken fingers soggy instead of crispy?
Sogginess usually means moisture got trapped in the coating. Double-check these fixes: Pat chicken dry before breading, don't overcrowd the air fryer basket, and rest the breaded fingers for 5 minutes before cooking. Also, avoid opening the air fryer during cooking—this lets steam escape and helps maintain crispness.
What's the best way to keep these crispy for serving at a party?
Keep cooked fingers warm in a 200°F oven on a wire rack (not a plate) for up to 30 minutes. For longer parties, cook in batches and reheat at 375°F for 2-3 minutes before serving. Pro tip: Serve with dipping sauces in small ramekins to keep fingers separate and maintain crispness.
Can I make these gluten-free?
Replace the flour with 1 cup gluten-free all-purpose flour blend and use gluten-free panko (like Schär brand). The cornstarch in the egg wash can stay as-is. For extra crispiness, add ¼ cup crushed gluten-free cornflakes to the panko mixture. The texture will be slightly different but still delicious.
How do I adjust the recipe for a larger crowd?
Double the recipe but cook in two batches—never overcrowd the air fryer. For 8 servings, use 3 lbs chicken, 2 cups flour, and 3 cups panko. Cook the first batch at 375°F for 12-14 minutes, then the second batch immediately after. Keep the first batch warm in the oven as mentioned above.