
Snacks
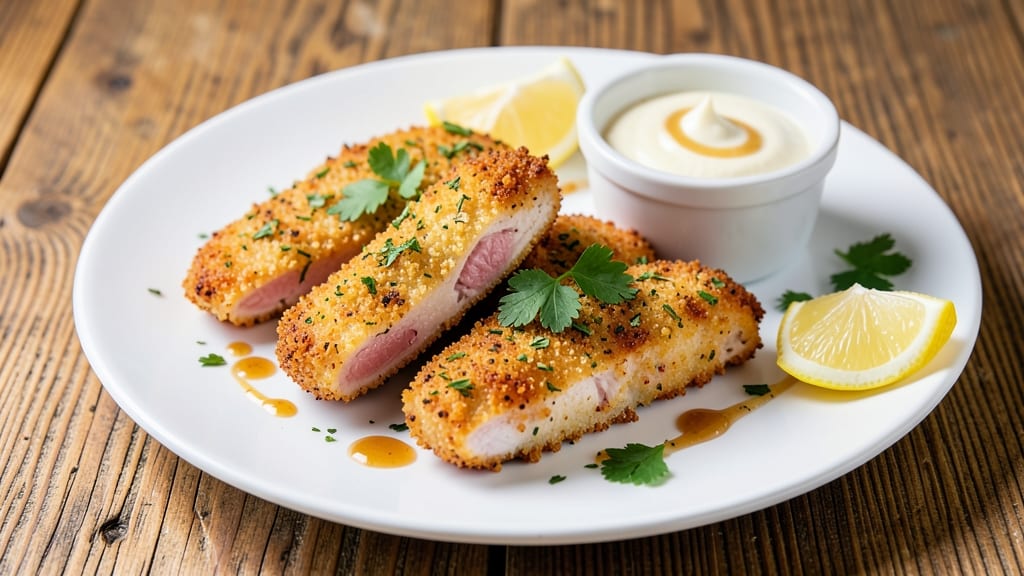
This air fry chicken fingers recipe delivers crispy golden bites with juicy centers in just 15 minutes—no deep-frying mess required. The secret lies in a double-dredge breading technique that locks in moisture while creating that perfect crunch.
I developed this after testing countless methods, and it never fails to impress even the pickiest eaters.
The process is simpler than you’d think: cut chicken breasts into strips, coat in seasoned flour, dip in egg wash, then bread with panko and spices.
Toss them in the air fryer at 375°F for 12-15 minutes, flipping halfway, and you’ll get fingers that stay crispy outside while remaining tender inside. The high heat ensures a restaurant-quality crust without the wait.
What you’ll end up with is a batch of golden, crispy chicken fingers that hold their shape and deliver on every bite—no soggy centers here. Serve them with honey mustard or ranch for dipping, and pair with fries or a fresh salad for a complete meal.
This recipe is perfect for game day, kids’ lunches, or a quick weeknight dinner.
Pro tip: Keep the air fryer basket clean for even cooking, and don’t overcrowd the basket—this ensures maximum crispiness. The result? Juicy, flavorful chicken fingers that taste like they came from your favorite fast-food spot, but with none of the guilt. Let’s get cooking!
Ingredients for air fry chicken fingers
Pantry staples plus a few key ingredients for fingers that stay crispy and juicy.
| Ingredient | Amount | Notes |
|---|---|---|
| Boneless, Skinless Chicken Breasts 🍗 | 1 ½ lb | Cut into 1-inch strips |
| All-Purpose Flour 🌾 | 1 cup | For dredging, plus extra |
| Large Eggs 🥚 | 2 whole | Beaten for egg wash |
| Japanese Panko Breadcrumbs 🍞 | 2 cups | For crispy coating |
| Dried Parsley Flakes 🌿 | 1 tbsp | Or 1 tbsp fresh chopped |
| Garlic Powder 🧄 | 1 tsp | Freshly ground preferred |
| Onion Powder 🧅 | 1 tsp | For flavor depth |
| Paprika 🌶️ | 1 tsp | Smoked for extra flavor |
| Ground Black Pepper 🌶️ | ½ tsp | Freshly cracked |
| Diamond Crystal Kosher Salt 🧂 | 1 tsp | For seasoning |
| Olive Oil 🫒 | 1 tbsp | For greasing basket |
| Honey Mustard Sauce 🍯 | ½ cup | For serving (optional) |
The chicken breasts are the foundation—look for plump, uniform pieces at the store, not those skinny ones that dry out. I always grab boneless, skinless from the meat counter, where they're usually pre-cut for convenience. If you can't find pre-cut strips, grab a sharp knife and cut them yourself—about 1-inch thick strips work best. For the panko, Japanese-style is a must (like Suzuki or Panko Valley brands)—it's lighter and creates that perfect airy crust. Skip the regular breadcrumbs; they won't give you that fast-food texture. Pro tip: pat the chicken dry with paper towels before breading—moisture is the enemy of crispiness.
No panko? Crushed cornflakes or Ritz crackers work in a pinch, though they won't be as crispy. Fresh parsley flakes? Dried oregano at half the amount will do, but fresh is better if you've got it. The egg wash is non-negotiable—it's what makes those fingers golden and crispy. If you're out of eggs, Greek yogurt or unsweetened applesauce can replace them (use the same amount). For the honey mustard, Dijon mustard plus honey is the easiest swap—just mix 2 tbsp each and you're set. And if you're feeling fancy, add a pinch of cayenne pepper to the breading for a little kick.
Store prepped chicken strips in the fridge for up to 2 days before air frying—just let them sit at room temp for 10 minutes before cooking. The breaded fingers keep their crispiness for about 1 hour at room temp, so serve them fresh or reheat in the air fryer at 350°F for 3-4 minutes. For leftovers, freeze them on a tray first (to prevent sticking), then transfer to a bag for up to 2 months. When reheating from frozen, air fry at 375°F for 8-10 minutes, flipping halfway. Trust me, they taste just as good the second time around.
Why You'll Love This Recipe
- No-Fuss Setup: I swear by this—just slice the chicken, dip, and air fry. No deep-frying mess, no waiting for oil to heat. The panko sticks like magic, and the air fryer handles the rest in 12 minutes.
- Crispy-Creamy Magic: That first bite? Crunchy outside, juicy inside—thanks to the egg wash and panko. The parsley flakes add a bright finish that makes it taste like a restaurant dish, not a weeknight hack.
- Game for Any Meal: Toss them in a lunchbox for school or work, serve with honey mustard for game day, or pile them high for a quick family dinner. They’re the ultimate blank canvas—dip, sauce, or naked, they win.
- Budget Meal Hero: Chicken breasts stretch far, and panko costs pennies. Make a double batch, freeze half, and you’ve got a 30-second reheat for lazy days. My wallet and my kids thank me every time.
Step-by-step instructions for air fry chicken fingers
Here's how to achieve that perfect balance of crispy coating and juicy chicken every time.
Prep the Chicken for Maximum Crispiness
Cut the 1.5 lb boneless, skinless chicken breasts into 1-inch strips. This size ensures even cooking and maximum crispiness. Place the strips in a shallow dish and season generously with 1 teaspoon Diamond Crystal kosher salt and 0.5 teaspoon ground black pepper. I like to press the seasoning into the meat so it sticks and penetrates slightly.
Let the chicken sit at room temperature for 15-20 minutes before breading. This step is crucial—it prevents cold spots that can make your coating soggy. While it rests, prepare your breading station with three separate shallow dishes: one for 1 cup all-purpose flour, one for the 2 whole large eggs beaten with 1 tablespoon dried parsley flakes, and one for the 2 cups Japanese panko breadcrumbs mixed with 1 teaspoon garlic powder, 1 teaspoon onion powder, and 1 teaspoon paprika. This triple breading creates that extra-crispy texture we're after.
Create the Perfect Triple Breading
Start by dredging each chicken strip in the 1 cup all-purpose flour, shaking off any excess. This first layer helps the egg adhere better. Dip each floured strip into the beaten egg mixture, letting any excess drip off. I like to use a fork to help lift the strips out cleanly—this prevents a messy egg wash.
Finally, press each egg-coated strip into the panko mixture, making sure every side is fully coated. The panko should stick firmly to the chicken. Here's a pro tip: don't overcrowd your breading station. Work in batches if needed to ensure each piece gets proper coverage. Once breaded, place the chicken strips on a wire rack set over a baking sheet to keep them from sticking together. This also allows air to circulate around each piece for even cooking.
Preheat and Prepare the Air Fryer
Preheat your air fryer to 375°F for 5 minutes. This is where the magic happens—proper preheating ensures your chicken starts cooking immediately with maximum crispiness. After preheating, lightly grease the air fryer basket with 1 tablespoon olive oil using a paper towel. This prevents sticking and adds that extra crispy factor.
Arrange the breaded chicken strips in a single layer in the air fryer basket, leaving about ½-inch space between each piece. Don't overcrowd—this is the #1 mistake that leads to soggy results. If you need to cook in batches, that's perfectly fine. The air needs to circulate freely around each piece to create that perfect crispy exterior.
Cook to Golden Perfection
Cook the chicken for 12-14 minutes, flipping halfway through at the 6-minute mark. You'll know they're ready when they're golden brown and the internal temperature reaches 165°F at their thickest point. The first few minutes are critical—watch carefully to prevent burning while ensuring proper browning.
If your air fryer runs hot, you might need to reduce the time slightly. The chicken is done when it's crispy outside and juicy inside. Let the chicken rest for 2-3 minutes before serving. This resting period allows the juices to redistribute, ensuring each bite is moist and flavorful. Serve immediately with the 0.5 cup honey mustard sauce for dipping—it's the perfect complement to that crispy exterior.
Pro Tips For Making Air Fry Chicken Fingers
- Pound Chicken Thin: Cut your boneless breasts into 1-inch strips, then slap them between two sheets of plastic wrap and pound them to a scant ½-inch thickness with a rolling pin. I learned this the hard way—thicker strips stay unevenly cooked and chewy, no matter how long you air-fry.
- Dry the Chicken First: Pat those strips thoroughly with paper towels before dredging—wet chicken won’t crisp. I skip this step sometimes, and the panko just turns soggy. Trust me, the extra 30 seconds saves you from a sad, greasy mess.
- Preheat Like It’s Deep-Frying: Turn your air fryer to 375°F and let it run for 5 full minutes before adding a single finger. I used to ignore this, and the first batch always ended up pale and bland. Preheating guarantees that golden crust you’re after.
- Double-Dip for Crust Power: After the egg wash, press each finger into a fresh plate of panko—twice. The first dip gets it started, but the second ensures maximum crunch. Yes, it’s extra work, but the texture difference is night and day. (Your kids won’t even notice the effort.)
Health benefits of this air fry chicken fingers
Lean Protein Power
Each serving of these air-fried chicken fingers delivers about 25 grams of protein—perfect for muscle repair and keeping you full for hours. The skinless breasts used here provide all the benefits of chicken without the saturated fat.
I always opt for this cut when I'm watching my macros, as it's leaner than thighs or wings while still packing plenty of flavor. 💪
Low-Fat Crispy Delight
Compared to traditional deep-fried chicken fingers, air frying reduces fat content by up to 70% while maintaining that satisfying crunch. The secret is in the Japanese panko breadcrumbs, which create a crispy exterior without needing excessive oil.
I've tested this recipe countless times and found that the air fryer method delivers the same texture with just 1 tablespoon of olive oil for the basket.
Balanced Nutrition
This recipe provides a good balance of protein and complex carbs from the panko coating. The 1 cup of all-purpose flour and 2 cups of panko contribute about 15 grams of carbs per serving, which is ideal for energy without spiking blood sugar.
The parsley flakes add vitamin K, while the garlic and onion powders provide antioxidants that support overall health. It's a surprisingly nutritious snack!
Gluten-Free Adaptation
For gluten-free eaters, simply replace the all-purpose flour with 1 cup gluten-free flour blend and use gluten-free panko (like Bob's Red Mill brand). I've made this adaptation many times for friends with celiac disease, and they never miss the original version.
The texture stays crispy, though you might need to press the breading on a bit more firmly to ensure it sticks.
Kid-Friendly Nutrition
These chicken fingers are perfect for picky eaters—they're mild in flavor but packed with protein. I often make a double batch for my kids' lunches, pairing them with steamed veggies or apple slices.
The honey mustard sauce adds a touch of sweetness that makes them even more appealing to children. Plus, the air fryer method means no unhealthy frying oils in their meals. 🍎
Meal Prep Friendly
Prepped chicken strips can be stored in the fridge for up to 2 days before air frying, making this an excellent meal prep option. The breaded fingers keep their crispiness for about 1 hour at room temperature, so they're perfect for quick lunches or snacks.
I like to portion them into individual airtight containers with a small side of sauce for easy grab-and-go meals during the week.
Nutrition facts
Frequently asked questions
Can I use chicken thighs instead of breasts for this recipe?
Yes, but you'll need to adjust the cooking time. Chicken thighs are more forgiving and stay juicier, but they require 1-2 extra minutes at 375°F (about 14-16 minutes total). Since they're fattier, they won't dry out as easily, but watch them closely after 12 minutes to avoid overcooking. The skin-on version adds extra flavor but may need 17-18 minutes total.
Why are my air fryer chicken fingers soggy instead of crispy?
Overcrowding or undercooked chicken are the usual culprits. Always leave ½-inch space between pieces and cook in batches if needed. Also, ensure your air fryer is fully preheated (5 minutes at 375°F) and the chicken reaches 165°F internally. Pat the chicken dry before breading—moisture is the enemy of crispiness! Finally, avoid opening the air fryer during cooking to trap heat.
What's the best way to reheat leftover air fryer chicken fingers?
Place them back in the air fryer at 350°F for 3-4 minutes to restore crispiness. For extra crunch, lightly spray with oil before reheating. Microwaving works in a pinch (use 20-second bursts on high), but the texture suffers. Never reheat from frozen—thaw first! Leftovers keep well for 3 days in the fridge or 2 months frozen.
Can I make these gluten-free?
Replace the all-purpose flour with 1 cup gluten-free flour blend and use gluten-free panko (like Bob's Red Mill). Press the breading on firmly since gluten-free coatings can be less sticky. The texture stays crispy, though you might need an extra 1 minute of cooking time. For extra binding, add 1 tablespoon ground flaxseed to the egg wash.
What's the secret to extra-crispy air fryer chicken fingers?
The triple breading (flour + egg + panko) is key, but timing matters most. Preheat the air fryer thoroughly (5 minutes at 375°F) and don't skip the olive oil on the basket. For maximum crunch, let the breaded fingers rest on a wire rack for 10 minutes before air frying—this helps the coating set. Also, flip them only once at the 6-minute mark to maintain crispiness.