
Main Courses
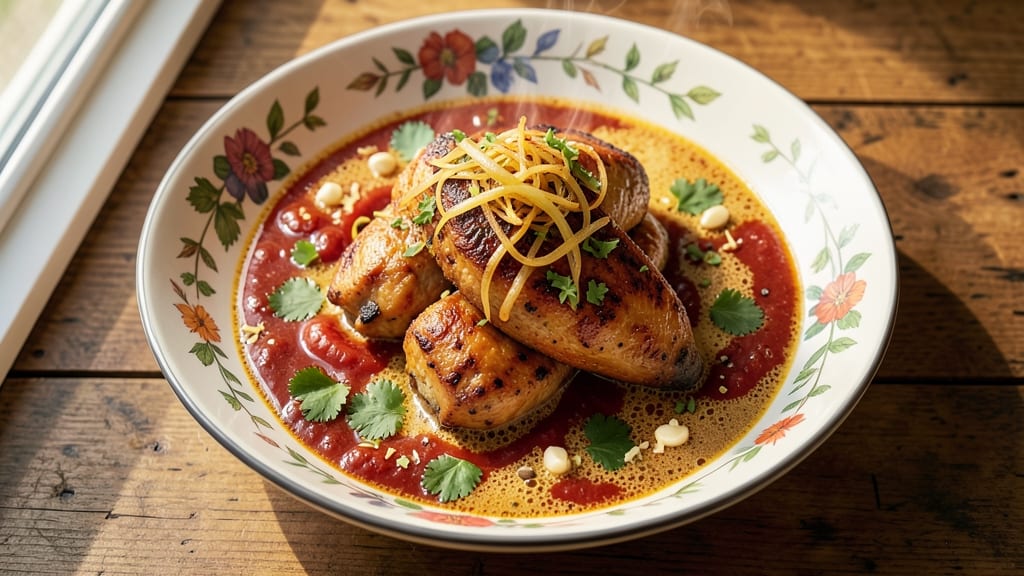
Aromatic chicken curry transforms simple ingredients into a restaurant-worthy dish with layers of coconut, herbs, and spice that linger long after the last bite. This one-pot recipe builds depth through careful spice blooming and slow simmering, ensuring every spoonful delivers complex, fragrant flavor without overwhelming heat. I developed it after years of testing—balancing creamy coconut with bright citrus and earthy spices creates harmony that feels both comforting and sophisticated.
The secret lies in two simple techniques: toasting whole spices until fragrant (never skip this step!) and simmering the curry uncovered to let flavors concentrate. Chicken cooks tender while absorbing the aromatic broth, resulting in meat that falls apart at the touch of a fork.
The sauce thickens beautifully without separation, coating each bite in velvety richness. This method delivers professional-quality results in under an hour—perfect for weeknight dinners that feel like a celebration.
What you'll achieve is a curry that's creamy yet balanced, with tender chicken swimming in a sauce that's fragrant enough to fill your kitchen. The combination of coconut milk, fresh herbs, and carefully measured spices creates depth that transforms basic chicken into something extraordinary.
Serve with basmati rice or warm naan to soak up every last drop of that fragrant sauce. The instructions walk you through each step with precision timing and temperature control.
This recipe scales effortlessly for crowds while maintaining its elegant simplicity—ideal for meal prep or impressing guests. The aromatic base freezes beautifully, so you can make a double batch and enjoy it all week.
Let's create a curry that tastes like it came from a high-end restaurant, starting with these straightforward instructions that deliver foolproof results every time.
Ingredients for aromatic chicken curry
Coconut milk, fragrant spices, and tender chicken—simple ingredients that create restaurant-worthy depth.
| Ingredient | Amount | Notes |
|---|---|---|
| Boneless, Skinless Chicken Thighs 🍗 | 1 ½ lb | Trimmed of excess fat |
| Full-Fat Coconut Milk 🥥 | 1 can | 13.5 oz can, unsweetened |
| Yellow Onion 🧅 | 1 whole | Medium size, finely chopped |
| Garlic Cloves 🧄 | 6 cloves | Fresh, peeled and minced |
| Fresh Ginger 🌿 | 1 tbsp | Finely grated, not minced |
| Canned Tomato Sauce 🍅 | 1 cup | San Marzano preferred |
| Green Chilies 🌶️ | 2 whole | Fresh, seeded and chopped |
| Coriander Seeds 🌿 | 1 tbsp | Toasted until fragrant |
| Cumin Seeds 🌶️ | 1 tsp | Toasted until aromatic |
| Turmeric Powder 🧂 | ½ tsp | Freshly ground preferred |
| Ground Black Pepper 🌶️ | ½ tsp | Freshly cracked |
| Fresh Cilantro 🌿 | ¼ cup | Chopped, stems removed |
| Fresh Lemon Juice 🍋 | 2 tbsp | Freshly squeezed |
| Ghee or Coconut Oil 🫒 | 2 tbsp | For spice blooming |
| Salt 🧂 | 1 ½ tsp | Diamond Crystal kosher |
The coconut milk is non-negotiable here—full-fat, unsweetened canned delivers that velvety texture. Thai Kitchen or Aroy-D brands are my go-to for consistency, but any quality can works. Chicken thighs stay juicier than breasts, so don't swap unless you're okay with slightly drier meat. For the spices, toast the whole seeds first—that's what unlocks the aroma. I always grab my coriander and cumin from Penzeys or the bulk bins at Whole Foods; the difference in freshness is noticeable. Fresh ginger and garlic? Don't use jarred—the flavor is flat in comparison.
No fresh cilantro? Dried works at one-third the amount, but it won't have that bright finish. Running low on green chilies? Substitute with 1 tbsp chili paste—just add it with the coconut milk. The tomato sauce can be fresh or canned, but San Marzano makes a world of difference. Short on time? Pre-minced garlic from the jar is fine, but fresh is always better. For the ghee, if you're avoiding dairy, pure coconut oil works perfectly—just don't skimp on the quantity. The lemon juice should be freshly squeezed; bottled just doesn't cut it here.
This curry tastes even better the next day—make a double batch if you can. Store in airtight containers for 4-5 days in the fridge, or freeze for 3 months. The sauce thickens as it sits, so you might need to add a splash of water or coconut milk when reheating. I always portion mine into containers with rice on the side so lunches are ready to grab. The spices? Keep them in a cool, dark place—they'll stay potent for 6-12 months if stored properly.
Why You'll Love This Recipe
- Here’s what sold me: the full-fat coconut milk turns this into a velvety, fragrant hug of a dish with almost no work. The garlic and ginger sizzle into the onions until the kitchen smells like a spice market, and by the time the chicken soaks up that creamy sauce, it’s ridiculously tender.
- One-Pot Magic: I swear by this recipe because it’s literally one pot—no chopping boards covered in garlic paste, no extra pans to wash. Just sear the chicken, toss in the onions and ginger, and let the coconut milk do the heavy lifting. That’s it.
- Rich Without Effort: Here’s what sold me: the full-fat coconut milk turns this into a velvety, fragrant hug of a dish with almost no work. The garlic and ginger sizzle into the onions until the kitchen smells like a spice market, and by the time the chicken soaks up that creamy sauce, it’s ridiculously tender.
- Leftovers That Last: Between us, this curry tastes even better the next day—yes, even on a Tuesday night. The flavors meld into something deeper, and it reheats like a dream. I make a double batch on Sundays, freeze half, and still have a week’s worth of lunches that feel fancy.
Step-by-step instructions for aromatic chicken curry
This one-pot curry builds layers of flavor through careful technique—let's create something truly fragrant.
Bloom the Spices in Ghee
Heat the 2 tablespoons ghee or coconut oil in a heavy-bottomed pot over medium heat. Add the 1 tablespoon coriander seeds and 1 teaspoon cumin seeds, stirring constantly. Watch closely—they'll begin to dance and pop within 30 seconds, releasing their essential oils and filling your kitchen with an irresistible aroma. This is where the magic starts.
Once the seeds are fragrant and just beginning to turn golden, add the 1 whole yellow onion, chopped into even pieces. Cook for 5 minutes until the onions soften and take on a deep golden hue. Here's the thing—don't rush this step. Properly bloomed spices and caramelized onions form the flavor foundation of the entire curry. If the onions start to brown too quickly, reduce the heat slightly to prevent burning.
Add Aromatics and Build the Base
Stir in the 6 cloves garlic and 1 tablespoon fresh ginger, mincing them directly into the pot as they cook. Let them sizzle for 1-2 minutes until fragrant but not browned—you want their flavors to infuse without bitterness. Add the 2 whole green chilies, chopped, and cook for another 30 seconds to soften slightly.
Pour in the 1 cup canned tomato sauce and stir to combine with the aromatics. Let this mixture simmer for 3-4 minutes until it thickens slightly and the raw tomato taste mellows. This step develops the sauce's depth. Here's where it gets important: don't let it burn. If the mixture starts to stick, add 1-2 tablespoons water to keep it moving. The goal is a smooth, cohesive base that will carry all the flavors forward.
Season and Cook the Chicken
Add the 1.5 lb boneless, skinless chicken thighs to the pot, spreading them out evenly. Sprinkle over the 1.5 teaspoons salt, 0.5 teaspoon turmeric powder, and 0.5 teaspoon ground black pepper. Gently stir to coat the chicken thoroughly with the spiced tomato mixture. Let the chicken cook undisturbed for 5 minutes to develop a light crust on the bottom.
Pour in the 1 can full-fat coconut milk, stirring gently to combine. The mixture will bubble vigorously—this is normal. Reduce heat to medium-low and let the curry simmer uncovered for 25-30 minutes. You'll know it's ready when the chicken is tender and pulls away easily from the bone. The sauce should thicken slightly but remain creamy. If it reduces too quickly, add 2-3 tablespoons water to maintain the perfect consistency.
Finish with Fresh Herbs and Brightness
Once the chicken is cooked through, stir in the 2 tablespoons fresh lemon juice and 0.25 cup fresh cilantro. The lemon juice adds a bright, tangy finish that cuts through the richness of the coconut milk, while the cilantro brings freshness. Taste and adjust the seasoning if needed—you might want to add a pinch more salt or a dash of black pepper to balance the flavors.
Let the curry rest for 5 minutes off the heat. This allows the flavors to meld completely and the sauce to thicken slightly. Serve immediately over steamed basmati rice or with warm naan bread. The aroma alone will make your kitchen feel like a bustling Indian restaurant. Each bite should deliver tender chicken, rich coconut milk, and layers of aromatic spices perfectly balanced with the bright lemon and fresh cilantro.
Pro Tips For Making Aromatic Chicken Curry
- Bloom the Spices: Toast whole spices (cumin, coriander, turmeric) in oil for 30 seconds until fragrant—not browned—before adding onions. I used to skip this, and the curry always tasted flat. This step unlocks the real aroma, especially when you’re simmering with coconut milk later.
- Sweat Onions Low: Cook onions over medium-low heat until soft and translucent—not golden—before adding garlic and ginger. High heat burns them before they release their sweetness, and you’ll end up with a bitter base. Patience here makes the difference.
- Don’t Rush the Coconut: Simmer coconut milk on its own for 5 minutes after adding it to the curry. This lets the fat rise to the top, where it forms a luscious layer when you finish cooking. Skipping this step means a thinner, less rich sauce—no one wants that.
- Pat Chicken Dry: Wipe chicken thighs completely dry with paper towels before searing. Moisture steams them instead of browning, and you’ll end up with pale, bland meat. A quick rub with salt afterward helps too—trust me, it’s worth the extra 30 seconds.
Essential equipment for this recipe
Heavy-Bottomed Pot
Your choice of pot makes a world of difference in this curry. I swear by a 5-6 quart Dutch oven—specifically the Le Creuset Signature or All-Clad Stainless Steel—for even heat distribution and durability. The thick base prevents hot spots that can burn your spices.
If you're on a budget, a Calphalon nonstick Dutch oven works beautifully and makes cleanup a breeze. Avoid thin aluminum pots—they heat unevenly and can scorch your onions before the spices bloom properly. 🔥
High-Quality Spice Toasting Tools
For that essential spice blooming step, I recommend a small cast-iron skillet (like a Lodge 8-inch) or a stainless steel sauté pan to toast your coriander and cumin seeds. The key is a pan that conducts heat well without overheating.
I keep my spices in a spice grinder (like the OXO Good Grips) to freshly grind turmeric and pepper right before cooking—this makes a noticeable difference in flavor. Pre-ground spices lose potency quickly, so investing in whole spices is worth it for this recipe.
Measuring Tools
Precision matters with spices and liquids. I use a stainless steel measuring spoons set (like OXO's) for accurate measurements of coriander, cumin, and turmeric.
For liquids, a liquid measuring cup with clear markings ensures you get the exact 1 can of coconut milk and 1 cup tomato sauce without spills. A digital kitchen scale (like OXO's) comes in handy for weighing chicken thighs—aim for 1.5 lbs—though most packages list this clearly.
Don't skimp on these tools; they're the difference between "good" and "restaurant-quality" curry.
Wooden Spoon
A long-handled wooden spoon (I use OXO's 12-inch) is your best friend for stirring this curry. Wood won't react with acidic ingredients like metal might, and the long handle keeps your hand safe from the heat.
Avoid plastic spoons—they can melt or warp when exposed to high heat for extended periods. This spoon will help you scrape up every last bit of flavor from the bottom of your pot, ensuring no caramelized bits go to waste. 💫
Fine-Mesh Strainer
While not required, a fine-mesh strainer (like OXO's Good Grips) comes in handy if you want to strain the sauce for a smoother texture. This is especially useful if you prefer a velvety curry without any visible seeds or herbs.
I sometimes strain mine after simmering to create a more refined sauce, then stir in fresh cilantro at the end for that bright finish. If you don't have one, a cheesecloth works in a pinch—just ensure it's clean and damp to prevent sticking.
Timer and Thermometer
Set a kitchen timer (I use my phone's alarm) to track the 5-minute onion cook and 25-30 minute chicken simmer—this prevents overcooking or burning. For chicken doneness, a meat thermometer (like Thermoworks Smoke) ensures accuracy. The chicken is perfect at 165°F internal temperature.
If you don't have a thermometer, use the "fork test": the meat should pull apart easily. These tools take the guesswork out of timing and temperature, ensuring foolproof results every time. ⏰
Nutrition facts
Frequently asked questions
Why does toasting the spices matter so much in this curry?
Toasting releases the essential oils in coriander and cumin seeds, creating that signature aromatic depth. When you hear them pop and smell their fragrance, those oils infuse into the onions and ghee, forming the flavor foundation. Skipping this step means missing out on 50% of the curry's complexity—it's what transforms a good dish into something truly fragrant and restaurant-quality.
Can I use chicken breast instead of thighs?
You can try, but thighs stay juicier and more tender in this rich coconut sauce. If using breasts, reduce cooking time to 20 minutes and avoid overcrowding the pot. For best results, pound them slightly to even thickness. The breasts will absorb less moisture, so you might need to add 2 tablespoons extra coconut milk to maintain sauce consistency.
How do I adjust the heat level for sensitive eaters?
Remove the green chilies entirely and reduce black pepper to 1/4 teaspoon. For extra mildness, strain out the toasted spices before adding coconut milk. The curry will still be aromatic from the bloomed spices and coconut, just without the heat. If you want some spice but less intensity, use just 1 green chili instead of 2.
What's the best way to reheat leftovers?
Gently warm on the stove over low heat for 5-7 minutes, stirring occasionally. Add 1-2 tablespoons water or coconut milk if the sauce thickens too much. Microwaving can make the sauce separate—always reheat slowly to preserve the creamy texture. The curry actually improves after resting overnight, so leftovers often taste even better!
Can I make this curry in an Instant Pot?
Yes! Sauté the onions and spices as directed, then add all remaining ingredients except cilantro. Cook on High Pressure for 8 minutes, then quick-release. Finish with lemon juice and cilantro. For best texture, use bone-in chicken thighs (they stay juicier under pressure) and reduce coconut milk by 1/4 cup since it won't reduce as much.